
The Scientific-Minimalist Guide to Dead Frontier Missions: Secronom Bunker
OVERVIEW
The 20 missions at Secronom Bunker follow the familiar templates laid out in previous outposts: they involve looting, grinding, boss hunting, and rescuing. Because these missions take place in Red, Black, and White Zones, there is more potential danger from the local wildlife.
Fortunately, agro is not always the problem it might have been, and several of the looting missions can be easily completed. On the other hand, boss hunting missions (Wrath of the Wraiths, Need a Bigger Vial) border on the impossible for recent graduate students (i.e., those just past Level 50). Unless they are using speed boosts or hunting with help from others, students are advised to avoid these missions until their builds are further developed.
Missions:
- Firearm Shortage
- Security Leak
- New Life
- Extraction
- Valuable Data
- A Merciful End
- Generator Trouble
- Power Trip
- Find Evan
- Blood Hounds
- Extract My Men
- Need a Bigger Vial
- To The Slaughter
- Baby Blues
- Extinguish
- Just Borrowing Them
- Chemical Imbalance
- Disarmed
- Wrath of the Wraiths
- Mutate Away
WEAPONS
This guide assumes that students in Secronom Bunker have earned their Bachelor's Degree in Scientific Minimalism by developing one of our recommended builds past Level 50. These students should own at least one and preferably two 120-proficiency weapons, one for looting and one for grinding.
Weapons that we recommend graduate students use include:
Looting Weapons:
- Melee: Spiker, Dual Blade
- Pistols: Greyhawk, VLock, Doubleshot
- Rifles: Ironsight, Marksman G8
Grinding Weapons:
- Chainsaw: Ripsaw, Goretooth
- Submachine Guns: Uziel, Street Dog
- Assault Rifles: Hammerhead
- Shotguns: AA-12, Painshot, Ace Barrel
- Heavy Machine Guns: Vulcan, XLGunner-8
- Grenade Launchers: XM25, PAW, Immolator
Easier Secronom Bunker missions could certainly be completed with lesser weapons. More difficult missions may require ultra-expensive limited-edition weapons. However, the above recommendations should serve students well without straining their finances too much.
DIFFICULTY LEVELS
The following lessons rate the difficulty level of missions according to this scale:
- Easy
- Slight
- Challenging
- Extremely Challening
Easy missions can be completed by any competent student, even one only recently arrived at Secronom Bunker.
Slight missions have some small element of difficulty - usually, more annoying than challenging. These include looting missions for which it takes a frustratingly long time to obtain all the required items.
Challenging missions should be attempted by students who are properly equipped, well-trained, and capable of avoiding newbie mistakes.
Extremely Challenging missions are difficult if not impossible to complete without some kind of extra help: top-of-the line, limited-edition weapons; fellow hunters; speed and/or damage boosters.
SECRONOM BUNKER MISSION TIPS & TACTICS
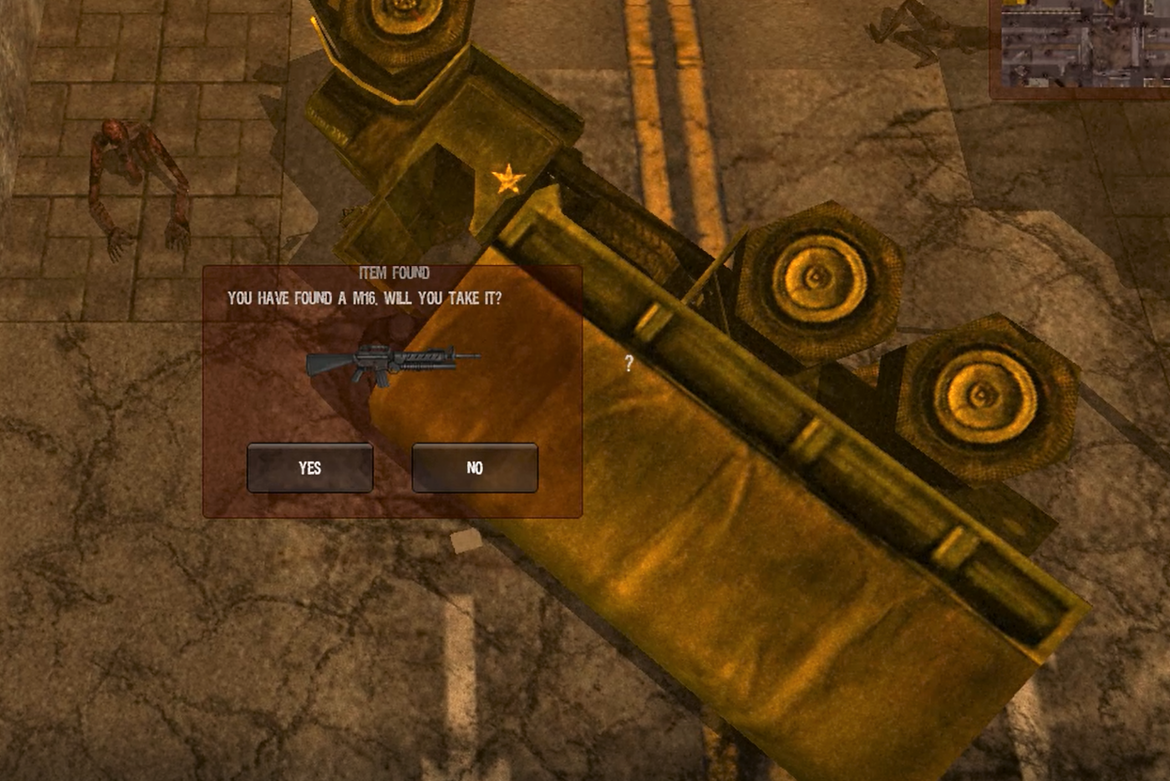
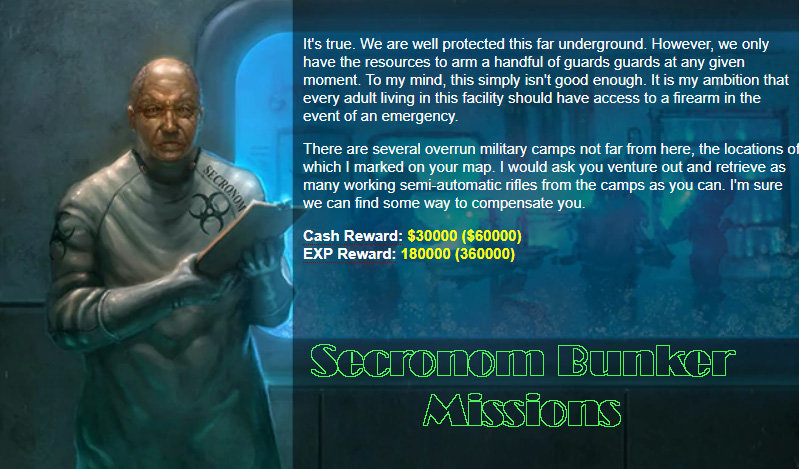
1. FIREARM SHORTAGE
- Type: Looting
- Goal: Obtain ten M16 assault rifles
- Zombies: Black Zone Population
- Aggro: None unless provoked
- Suggested Weapons: Best Available Quiet Looting Weapon
- Difficulty Level: Easy
"Firearm Shortage" is one of Secronom Bunker's easiest missions.
The M16s are found in military trucks - which are easy to spot and provide cover from any pursuing zombies. Students will be able to find 10 weapons without wasting time on useless loot spots.
Agro is low unless you provoke it.
Quiet looting weapons are recommended, preferably Melee. If zombies do attack, circle the area, using the military trucks as cover while you grab the M16s
"Firearm Shortage" takes place in two different mission areas, but they are too widely separated to make traveling between them worthwhile.
Go to the closest area, five zones down from Secronom Bunker. If necessary, exit and re-enter the area to find more M16s in previously looted trucks.
2 - SECURITY LEAK
- Type: Looting
- Goal: Obtain 10 Secronom Keycards
- Zombies: Black Zone Population
- Aggro: None unless provoked
- Suggested Weapon: Best Available Quiet Looting Weapon
- Difficulty Level: Easy
"Security Leak" is almost as easy as "Firearm Shortage."
The only "difficulty" is that the designated loot spots are not as easy to identify and do not deliver the required loot as consistently.
The Secronom Keycards can be looted from dead bodies.
The corpses litter the streets in far great number than usual, often in closely packed groups. With luck, a student can grab all ten cards before the local wildlife takes notice.
Unfortunately, the bodies sometimes yield more common loot items. It is possible to loot all the bodies and come up short of keycards.
"Security Leak" takes place in multiple mission areas, but students need visit only one to bag their quota of keycards.
We recommend sticking to the area closest to Secronom Bunker - two down and three right from the outpost. Simply exit and re-enter the mission area to pick up more keycards from previously looted bodies.

3 - NEW LIFE
- Type: Looting
- Goal: Obtain ten toys (dolls and teddy bears)
- Zombies: varies according to mission area
- Agro: Only if provoked
- Suggested Weapons: Best Available Looting Weapon
- Difficulty Level: Slight
New Life is simple looting mission - easy except for two small points:
- Loot is random - students cannot focus on a particular type of loot spot (e.g., vehicles or bodies).
- The percentage of loot spots that yield toys is low.
This makes it difficult to find ten toys in a single mission area.
Consequently, students have two options to complete the mission:
- Visit more than one mission area.
- Exit and re-enter one area in order to re-visit previously looted spots.
Other than that, students will encounter little difficulty completing this mission.
Each mission area is located in a different colored zone.
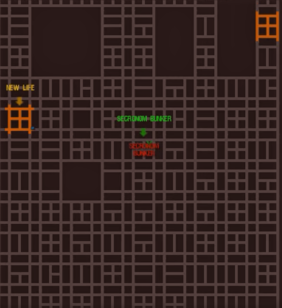 There is one Dark Red Zone, one Black Zone, and one White Zone.
The Red Zone is west of Secronom Bunker. The White Zone is northeast. The Black Zone is six areas due south (not shown on map at right).
The zombie population varies according to zone. The Dark Red Zone (with Red Long Arms and Red Rumblers) is easiest, but the most difficult mission area, White Zone, affords better loot for students who want to fill their inventory slots after completing the mission.
4. EXTRACTION
- Type: Search & Rescue
- Goal: Make contact with four surviving scientists
- Zombies: Black Zone Population
- Agro: Dangerous
- Suggested Weapons: Vulcan plus a good looting weapon
- Difficulty Level: Challenging
Extraction is the first of a trilogy involving Secronom Bunker's sister facility to the south.
This first chapter is a rescue mission; subsequent missions involve looting and grinding.
Making the trip to and from the mission area is half the battle.
Students must take a very long walk into the southeastern section of Fairview, passing from Black Zones to Red Zones and back again. More on this below.
The mission itself is straightforward: contact four scientists and speak to them during lulls in agro until they decide to leave.
- Two of them are are half a block right of the southwestern intersection.
- One is a little father along, in a small park on the corner of the southern street's middle intersection.
- One is on the sidewalk of the street running east-west through the middle of the area, just left of the eastern intersection.
If you do not see the scientists, keep circling the block and listen for gunfire.
Agro in the area is intense upon first arrival.
With myriad zombies attacking from all directions, we found the Hammerhead assault rifle not quite up to the task. The Vulcan did a good job hammering back the horde.
Typical for rescue missions, the scientists will not speak while under attack, so it is necessary to lure zombies away, then run around the area and speak to the scientists before agro catches up.
It may be necessary to circumvent the area two or three times to elude the agro. After that, it is relatively easy to stay so far ahead that that there is time to talk to the scientists - though it will be necessary to pick off individual zombies with a looting weapon.
DEALING WITH THE JOURNEY
In a way, the greatest difficulty of the Extraction trilogy is the long journey to the mission area. Odds of making the trek without running into a boss or at least an agro spike are slim. Students may reach the mission wounded, hungry, or low on medicine and ammunition.
Even if students arrive completely unharmed and healthy, there is a psychological component that cannot be overlooked: after investing so much time reaching the mission area - and knowing that a false move could result in an instant trip back to Secronom Bunker - fear of failure can be overwhelming, leading to second-guessing and excessive caution that compromise performance.
Our Advice: Build an outpost near the mission area.
Heal up, repair armour, restock ammunition, buy more meds - or simply take a break and relax. When fully rejuvenated, tackle the mission.
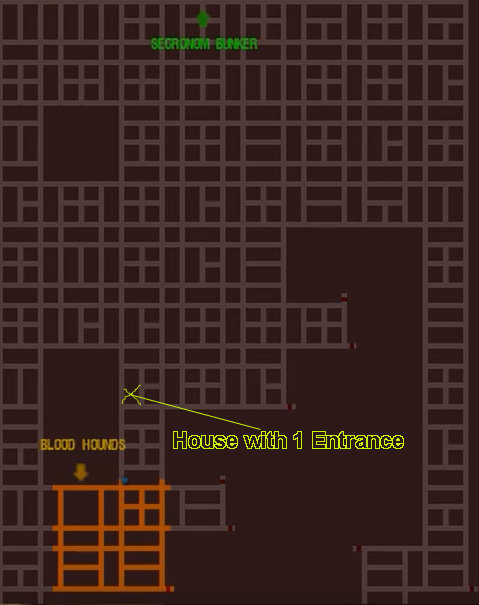
A house with a single entrance can be found two left and one down from the mission area. Students need bring only one set of wooden planks and nails to secure an outpost.
(There are houses in the mission area, but entering a house from an area loaded with agro risks luring agro inside. It is safer to use the house outside the mission area.)
Useful Tips:
- Take advantage of the long journey by looting along the way, especially in Red Zones with weaker zombies. Grab only easy loot; otherwise, the journey may take hours.
- Market prices in the southeastern end zone are not too outrageous. The cost of medicine and ammunition falls somewhere in the upper range of that seen in Secronom Bunker.
Advice and Tips apply to the following two missions as well.
5 - VALUABLE DATA
- Type: Looting
- Goal: "Find Adam" - actually, retrieve a hard drive from his corpse
- Zombies: Black Zone Population
- Agro: Moderate
- Suggested Weapons: Decent Looting Weapon
- Difficulty Level: Challenging
Part 2 of the Extraction trilogy is a looting mission disguised as a rescue mission.
Valuable Data asks students to find Adam, who was entrusted with a hard drive by scientists from the previous mission. However, Adam turns out to be dead. The actual goal is to loot the hard drive from his body.
Valuable Data takes students on another perilous journey to the southeastern section of Fairview.
The most direct route has students entering the mission from the west and moving east through four contiguous areas, including the one from Extraction.
Once inside the mission areas, success is relatively easy.
Simply search corpses until one yields the hard drive. There is some agro, but if it interferes with looting, move to the next mission area.
It is not necessary to thoroughly search every area for the hard drive.
Lootable corpses tend to be located near northwestern intersections. It is usually possible to enter an area and grab the loot before agro interferes. Walk east along the northernmost street, passing from one mission area to the next, checking each corpse in turn.
Bottom Line: With little need to confront the agro, Valuable Data is more easily completed than Extraction.
Useful Tip:
- See our Extraction lesson regarding the long trip from Secronom Bunker.
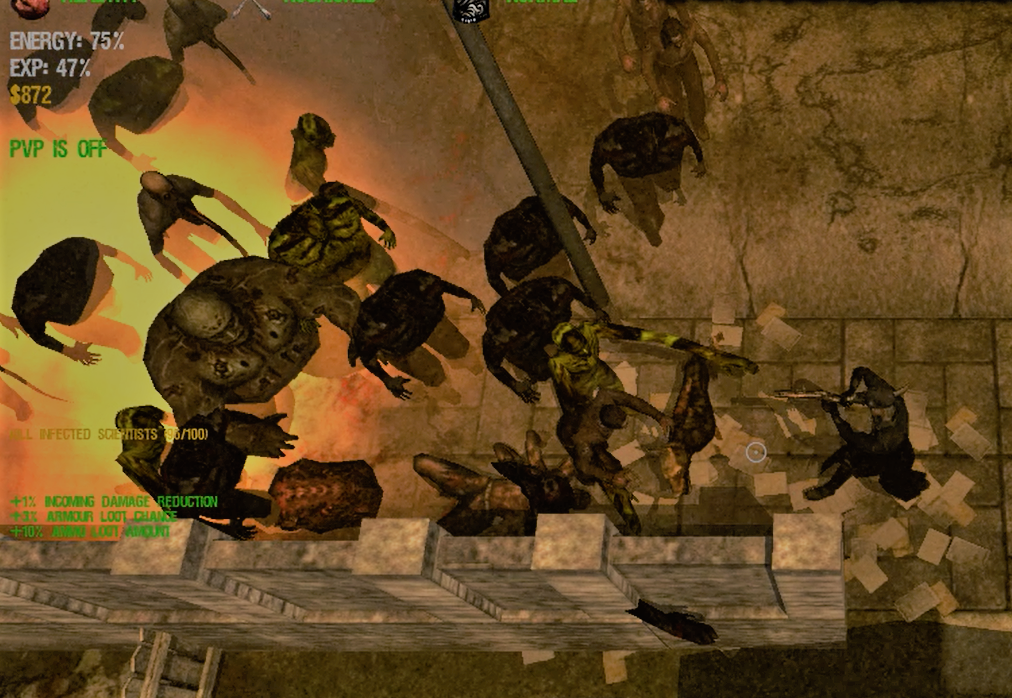
6 - A MERCIFUL END
- Type: Grinding
- Goal: Exterminate 100 scientists
- Zombies: Black Zone Population and Burned Males
- Aggro: Heavy
- Suggested Weapon: Hammerhead 47
- Difficulty Level: Challenging
The Extraction trilogy concludes with A Merciful End, which has students return to the area of the first mission and put 100 scientists out of their misery.
The Scientists are not dressed in lab coats; they are simply Male Zombies (with 24 health points), so they are easy to kill. However, scientists make up such a small percentage of the agro crowd that students have to shoot their way through a multitude of stronger zombies to hit the real targets.
Keep moving around the perimeter of the area, past intersections (which act as spawn points) so that more scientists will appear.
For most of the mission, the scientists spawn only one or two at a time. As the mission nears completion, scientists may show up in slightly larger numbers.
There are several walls and fences in the mission area, but none of them are ideal for trapping agro. In any case, a trapped swarm is unlikely to contain many scientists.
Bottom Line: By the standards of extermination missions, A Merciful End is less challenging than most.
Agro is moderate but not overwhelming. The chief difficulty lies in not targeting the scientists so single-mindedly that one overlooks the threat from other zombies.
Useful Tips:
- The Hammerhead 47 assault rifle is ideal for this mission. It is one of the few grinding weapons that delivers enough base damage to kill a male zombie with a single non-critical hit. While firing into the crowd, most bullets will hit other zombies, but every stray bullet that lands on a scientist will score an instant kill.
- Any good Grenade Launcher delivers enough DPH to one-hit-kill a male zombie. The blast can reach the scientists even when other zombies are shielding them from bullets.
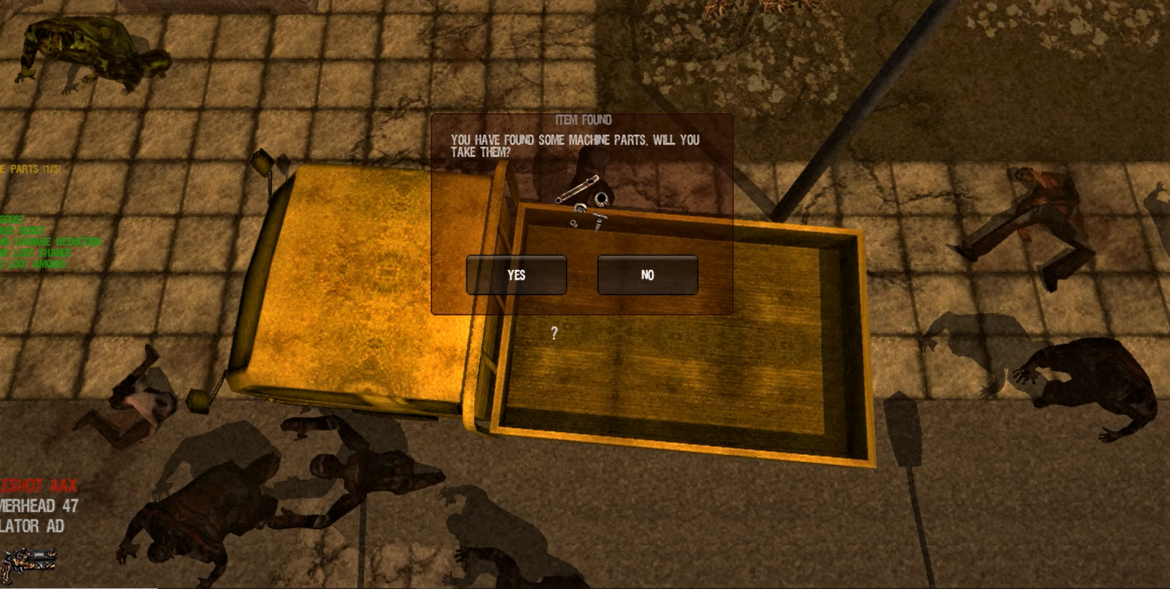 7 - GENERATOR TROUBLE
- Type: Looting
- Goal: Obtain five machine parts
- Zombies: vary according to zone
- Agro: Moderate
- Suggested Weapons: Best Available Looting & Grinding Weapons
- Difficulty Level: Slight
 "Generator Trouble" takes place in three separate mission areas: one in a Red Zone, one in a Black Zone, and one in a White Zone.
The difficulty level of agro varies accordingly, as does the chances of finding great loot besides machine parts.
All of the mission areas are eight zones from Secronom Bunker, so distance is not far. The mission areas to the northeast and northwest are actually slightly shorter walking distance because it is possible to somewhat cut through the zones at a diagonal.
A straightforward looting mission, Generator Trouble is more annoying than challenging.
Machine Parts can be found in vans or flatbed trucks, but not all trucks contain them. Even though only five machine parts are required to complete the mission, it is possible to loot every truck in a mission area and still come up short. At that points, the options are: walk to another mission area, or exit and re-enter the current area to research previously looted trucks.
Agro levels can make it difficult to loot without grinding through some of the crowd and then luring them away from the trucks.
On the plus side, with only five slots needed to fulfill the mission requirement, Generator Trouble provides an opportunity to collect lots of other loot.
Useful Tip:
- Difficulty varies by zone. Students attempting this mission for the first time should go down to the Red Zone, where the zombie population is less threatening. Students who want a bigger challenge and/or better loot can attempt the mission in the Black or the White Zone.
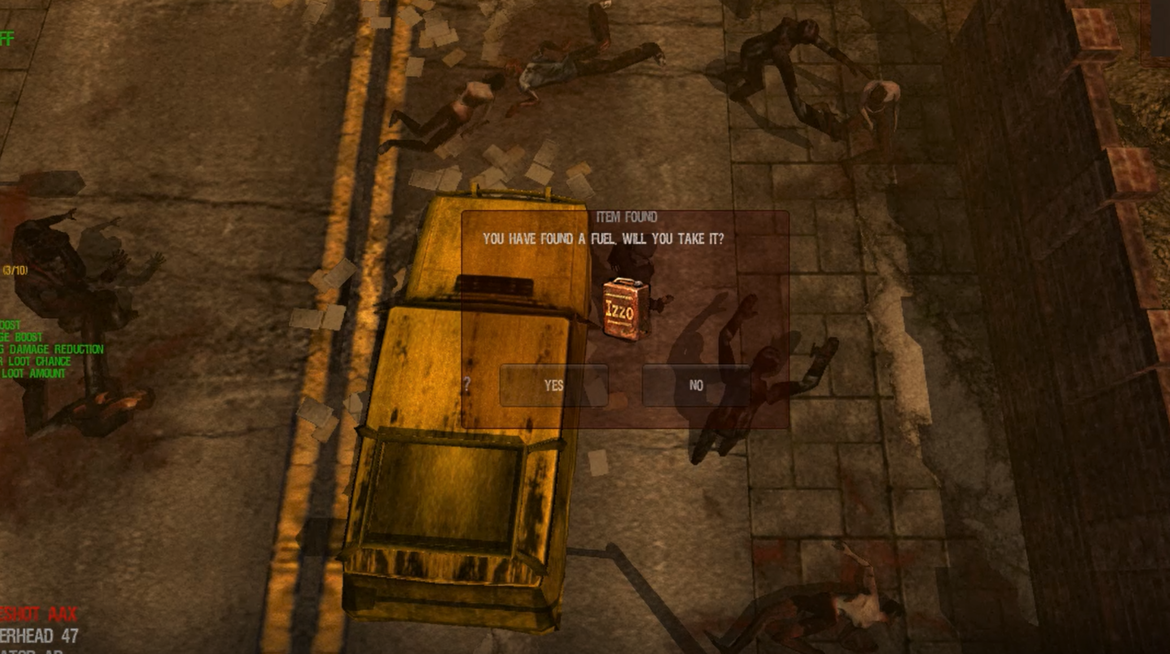
8 - POWER TRIP
- Type: Looting
- Goal: Obtain ten cans of fuel
- Zombies: White Zone Population
- Aggro: Low
- Suggested Weapons: Best Available Looting Weapon
- Difficulty Level: Slight
"Power Trip" is a retread of Fort Pastor's"Suck On This" mission, set in four white zones north of Secronom Bunker.
Students must retrieve ten cans of fuel from vehicles in the mission areas: cars, trucks, etc.
Some vehicles will contain other loot items, but several are clumped close together, making it relatively safe to loot two or three in quick succession.
Focus on easy-to-find loot, then move on.
It may be possible to complete the mission in a single area, by searching for each and every vehicle parked in a lot or tucked in an alleyway.
However, it is less burdensome to loot easy-to-find vehicles in streets and intersection. When these are exhausted, go find more in the next mission area.
Agro is low to non-existent upon initially entering a mission area.
It should be possible to grab a few cans of fuel before zombies take notice. Unfortunately, the population is so dense that it is impossible to go unnoticed for long.
Eventually, it will be necessary to shoot one or two zombies, provoking an agro spike.
At that point, defend yourself with a grinding weapon while leading the swarm around the block. Circle around back to the loot spot, using the vehicles to provide cover from the pursuing crowd.
If agro gets too intense, switch on to another mission area.
9 - FIND EVAN
- Type: Kill & Loot
- Goal: Exterminate a Bloat, retrieve Evan's Corpse
- Zombies: Black Zone Population, particularly Bloats
- Agro: High
- Suggested Weapons: Doubleshot or Marksman, Hammerhead or AA-12
- Difficulty Level: Slight
"Find Evan" is another looting mission disguised as a rescue mission.
Students are asked to locate a missing boy, but he turns out to be dead - swallowed by a Bloat. Students must kill Bloats until it is possible to loot Evan's corpse from one of them.
Ignore the highlighted mission areas in your viewscreen's map.
The map highlights every area around Secronom Bunker, but Evan can be found in the area one down and one right.
(This is the only area highlighted in the DFProfiler Bossmap.)
Agro is high but manageable.
Enter the mission area with your best defensive grinding weapon, and use it until it feels safe to switch to a looting weapon.
Use fences to block agro.
Running from north to south on east (right) side of the mission area is a complex consisting of buildings connected by fenced parking lots. Circling this complex will split the horde, making it easier to switch to a looting weapon and target Bloats.
The number of Bloats will quickly increase.
During the first circuit or two, few Bloats will appear, but their numbers soon increase. It will be necessary to kill several before one (or more) becomes lootable.
Don't worry about fighting to loot the Bloat's corpse.
Once a dead Bloat drops loot, it is possible to fight off the other zombies in order to retrieve Evan's Corpse. However, it is easier to continue running around the building complex, leading the horde away from the loot spot.
In fact, it is likely that more than one Bloat will be lootable. Outrunning the horde, students may stumble upon another dead Bloat, which could be easier to loot.
Useful Tips:
- Avoid shooting Bloats through the fences. It is easier to loot their bodies on the sidewalk than to go into the parking lot, which will be filled with other zombies.
- Bloats are easy targets, and the fences afford ample safe places for grinding. After completing the mission, stay in the area for a while and rack up some easy experience points.
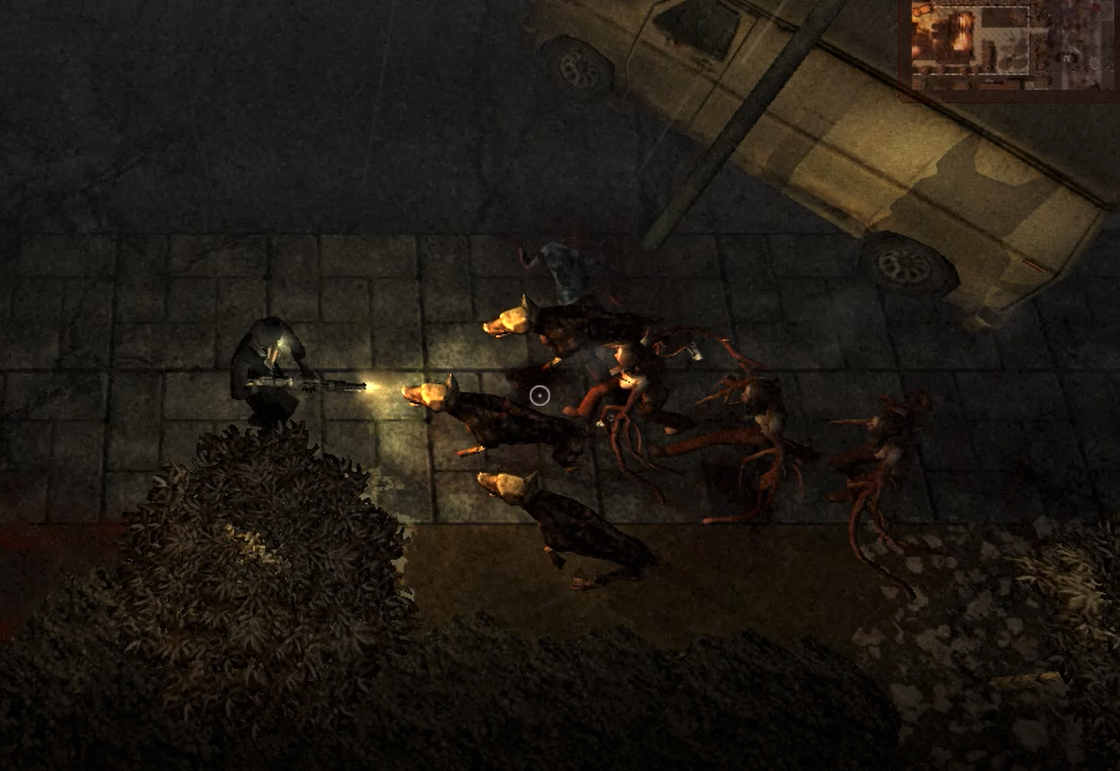
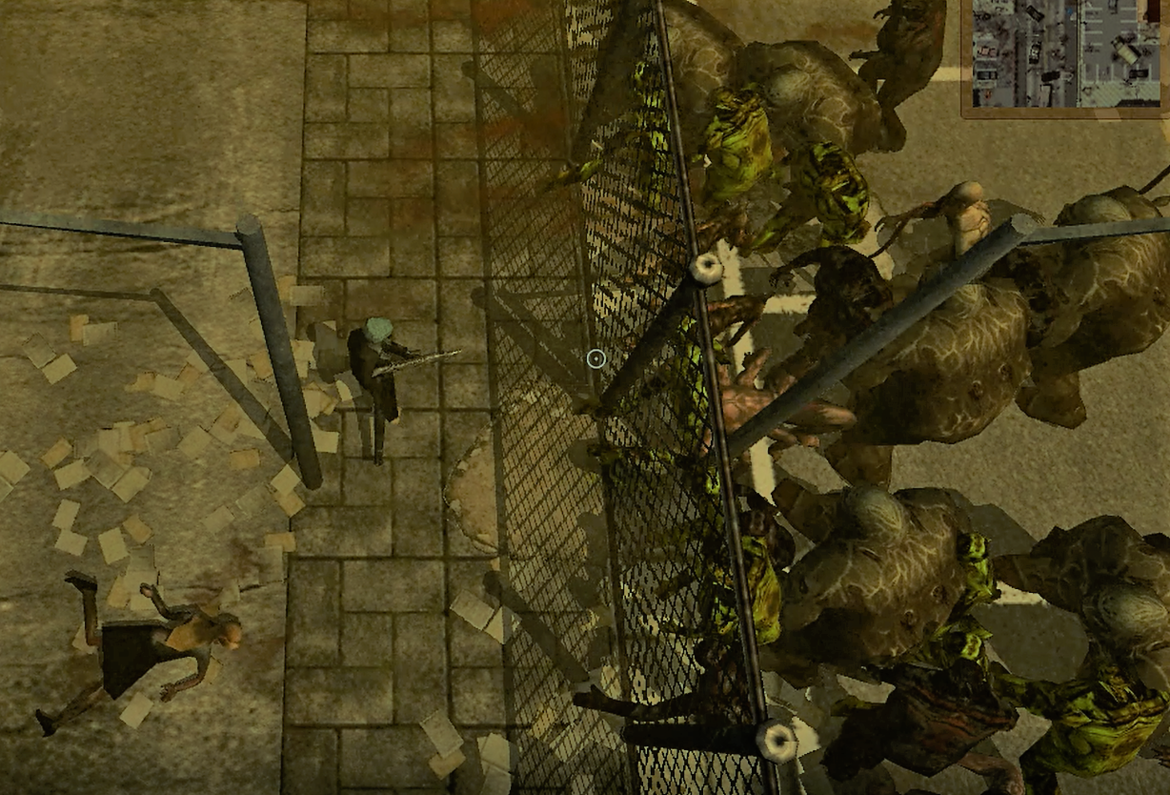
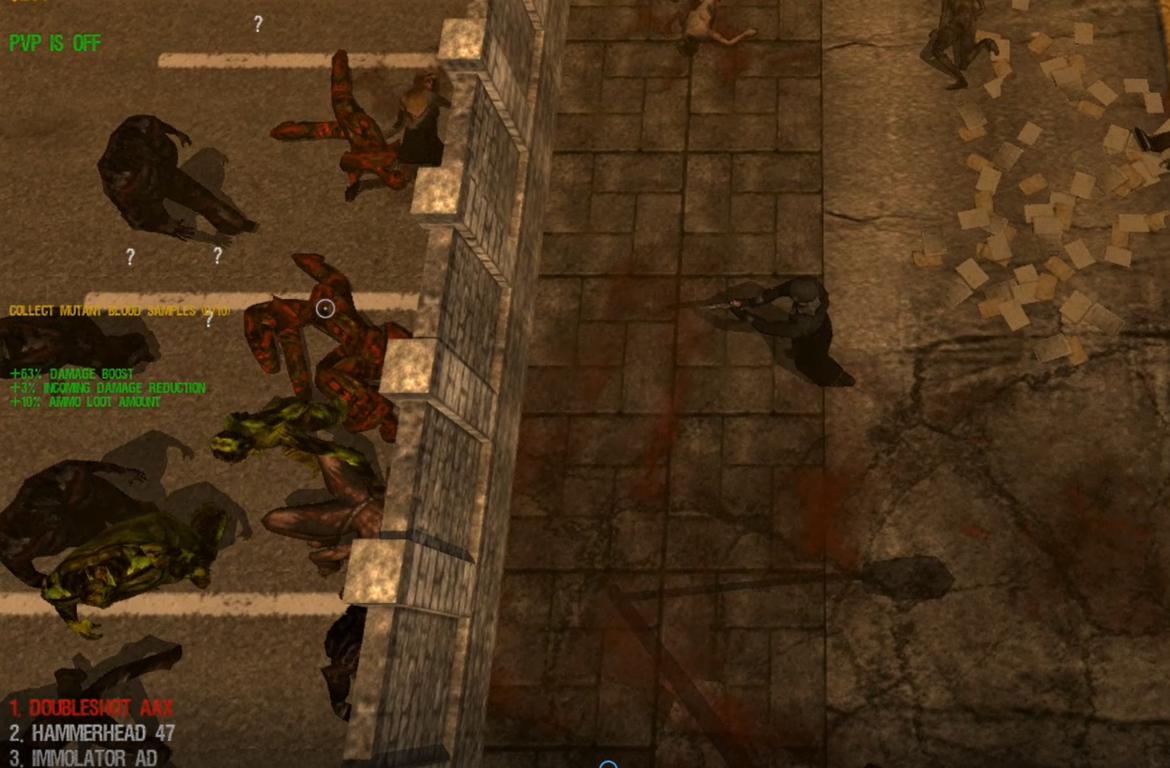
10 - BLOOD HOUNDS
- Type: Kill & Loot
- Goal: Exterminate ten Flesh Hounds and loot blood samples from them
- Zombies: Red Zone Population, plus Flesh Hounds
- Aggro: High
- Suggested Weapons: AA-12, Vulcan, Hammerhead, XLGunner
- Difficulty Level: Challenging
Despite the title, this mission has students hunting Flesh Hounds - not Blood Hounds.
Flesh Hounds are faster and more dangerous than Blood Hounds. Flesh Hounds are easy enough to handle one or two at a time, but it takes a little effort to handle them in groups.
"Blood Hounds" takes place in four mission areas in the eastern section of Fairview, a considerable distance south of Secronom Bunker.
 Follow our advice for "Extract My Men," which is also situated far from Secronom Bunker: bring enough ammo, meds, and food for the journey; then before entering the mission area, make your own outpost to restock supplies (leaving enough inventory slots for ten blood samples, of course).
There is a one-entrance house on the southwest block of the zone two up from the northeastern mission area. The most direct route from Secronom Bunker will take students through this zone, so they may as well stop here before moving on to the mission.
- Note: Goods and services are expensive or non-existent in the eastern marketplace of Fairview. Before leaving Secronom, make sure your storage is filled with everything you might need.
Agro is frustratingly difficult.
There are no Black or Irradiated Long Arms or Rumblers, but there are lots of Spiders and Tendrils. It can take a fair amount of ammo to cut through these creatures while trying to target the Flesh Hounds.
The usual strategy of running around the perimeter of the area to thin the zombie horde can still be made to work, but there are two difficulties.
1. The Flesh Hounds tend to spawn at intersections. No matter how often you circle the area, leaving the crowd behind, Flesh Hounds may dart out from unexpected directions as you turn a corner.
2. The mission areas tend to be porous, with several paths that zombies can use as shortcuts. This makes it hard to put a safe distance between you and the agro.
Neither of these factors makes the mission impossible - just more challenging than it initially appears. Even after you have killed enough Flesh Hounds to loot ten blood samples, it will be difficult to actually collect the loot.
- Note: The northwestern mission looks promising on the map, because there are no streets. This is deceptive - there are alleys cutting through the block that allow zombies to catch up as your try to evade them by circling the perimeter. Try the southwestern mission area instead.
Perseverance is key.
It may take longer than expected, but you will complete the mission if you persist. If one mission area is not working for you, try another. If you run low on food, meds, or ammo, retreat to your self-made outpost and restock.
Useful Tip:
- Students using a Doubleshot revolver as a looting weapon are advised to equip enough Rage or Violence Implants to one-crit-kill Long Arms. These are not the biggest headache in the mission, but dispensing with them quickly allows you to focus more attention on bigger threats.
11 - EXTRACT MY MEN
- Type: Search & Rescue
- Goal: Contact six survivors
- Zombies: Black Zone Population
- Aggro: maximum
- Suggested Weapons: AA-12, Hammerhead, Vulcan
- Difficulty Level: Challenging
This is another search-and-rescue mission, like "Extraction," but situated in three mission areas much closer to Secronom Bunker.
There are two survivors in each area, a soldier and a scientist. Most of them can be found on the open street, but one or two are in parking lots or alleyways. As usual, survivors will not leave until they have exchanged a few words, and some have more to say than others.
Agro is very intense, with few lulls, making it hard to get the survivors to leave.
Trying to stand and fight the horde is almost impossible. Luring the zombies away offers better chances of success.
- Strategy Suggestions:
Enter the area with a grinding weapon for protection. Search until you find one of the survivors. Lead the crowd away away, using your grinding weapon.
Circle the perimeter. This does two things: (1) gets the zombies away from the survivor; (2) gives you a chance to look for the second survivor in the area.
Keep going until the agro has thinned to the point that you can switch to a looting weapon and feel safe. Then run back to the survivor and talking to him until he leaves.
It may be necessary to repeat the process more than once with each survivor, depending on how long it takes the agro horde to catch up.
Useful Tips:
- Since the grinding weapon is just for defense, knockback is more important than DPS.
- Search for the street for easy-to-find survivors first. With luck, you will run across the harder-to-find survivors while luring the horde away from the first survivor.
12 - NEED A BIGGER VIAL
- Type: Boss Hunt &Loot
- Goal: Exterminate a Flaming Black Titan, loot a blood sample from its corpse
- Zombies: Black Zone Population, Flaming Black Titan
- Agro Level: High
- Suggested Weapons: Doubleshot, Marksman, Ironsight, Longshot
- Difficulty Level: Extremely Challenging
"Need a Bigger Vial" is straight-up boss hunting, pitting students against the biggest and most dangerous zombie haunting the inner city.
The Flaming Black Titan is so fast, strong, and dangerous that there it is nearly impossible to hunt safely. Ordinary weapons are not going to provide knockback, and skillful dodging is not going to keep you alive long enough to succeed.
Options include group boss hunting and speed boosters. The latter is highly recommended, because, once you can outrun the Flaming Black Titan, weapons become less of an issue - a good looting weapon with optimized accuracy and high Damage Per Hit will do the job.
Just keep running around the perimeter of the mission area to leave agro behind, and keep your finger on the trigger.
Before attempting this mission, it is advisable to scout the mission area (6 down, 1 right from Secronom Bunker) during a non-mission time. Fire up a machine gun to get a little agro going; then practice running through the streets to get a feel for the twists and turns needed to avoid obstacles.
There are no good fenced areas where you can trap the Flaming Black Titan.
Fortunately, there are some walls that will block agro. Of course you can trap the Flaming Black Titan behind a wall, but you will not be able to shoot it unless you have a Grenade Launcher.
Nevertheless, trapping the creature for a while will provide an opportunity to recharge your energy if you have expended too much while sprinting.

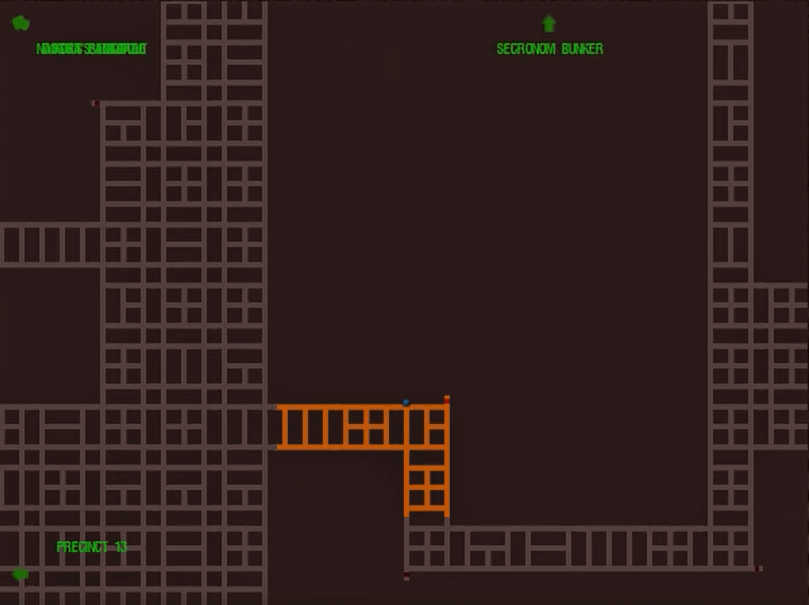
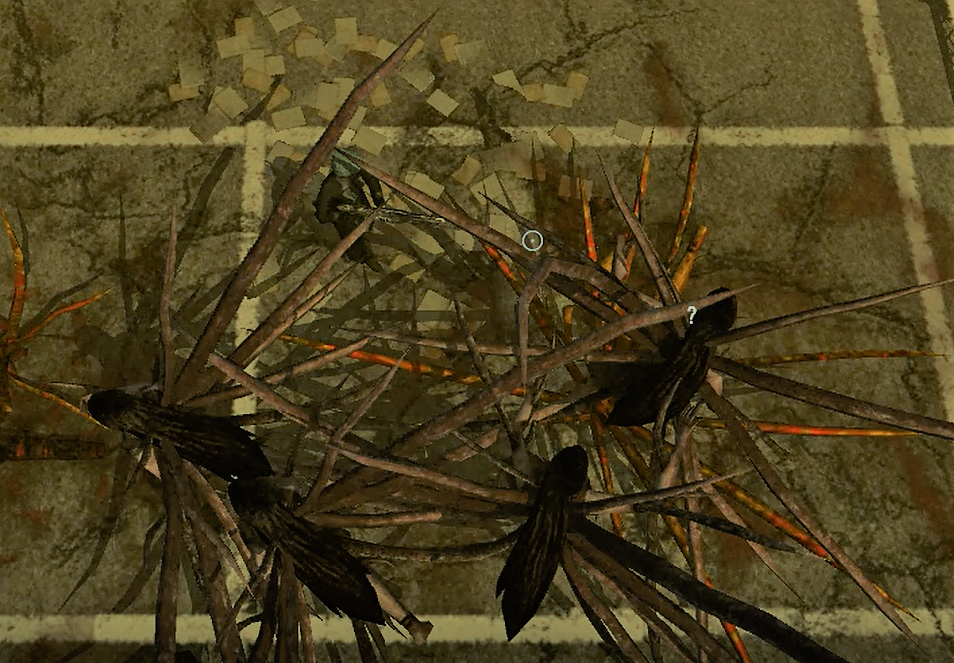
Best grinding spot in "To The Slaughter"
13 - TO THE SLAUGHTER
- Type: Search & Grind
- Goal: Contact two soldiers, exterminate 1,000 zombies
- Zombies: Eastern Red Zone Population (no Normal Zombies)
- Aggro: Maximum
- Suggested Weapons: XLGunner-8, Corpse Erruptor
- Difficulty Level: Challenging
Dangerous zombies and open street fighting make this mission dangerous.
"Mow Down" in Fort Pastor required a higher body count, but "To the Slaughter" is set in a more difficult mission area, an Eastern Red Zone with few good grinding spots, forcing students into open street fighting with Spiders, Tendrils, Long Arms, Rumblers, Black Long Arms, Black Rumblers, Irradiated Long Arms, and Irradiated Rumblers - all of which have over 200 health points.
Consequently, more Damage Per Second is required to complete the mission in a timely manner.
We recommend using an XLGunner-8 and/or a Corpse Erruptor.
Normally, we favor the Hammerhead 47 and the Immolator, but the faster firing speed of the Gunner and the Erruptor will benefit students trying to outmaneuver the agro:
- The XLGunner offers more knockback and DPS than the Hammerhead. It will hold off the horde and kill zombies faster.
- The Corpse Erruptor offers more stun than the Immolator, making it better for fighting in the open.
Students who can afford a Junker can use it instead of the Corpse Erruptor, but this expensive piece of equipment is not necessary to complete this mission.
Recommended Strategy:
- Sprint around the crowd with the grenade launcher until energy runs low. Then beat a slow retreat, using the Gunner to hold back the pursuing zombies while your energy recharges.
Agro is high, and there is no ideal kill zone.
 There are no tennis courts or fences to shield students while they safely shoot zombies.
There is one small walled area off an alley in the southeastern block (seen at right). It is possible to trap zombies in this space for a short time while blasting them with Explosives; unfortunately, the zombies soon spill out into the alley.
On the western block of the southernmost street, there are some cars and a bus that provide some cover. They will not hold the crowd back, but they will break up and funnel the horde to some extent, making it easier to dodge them as they squeeze through in small groups.
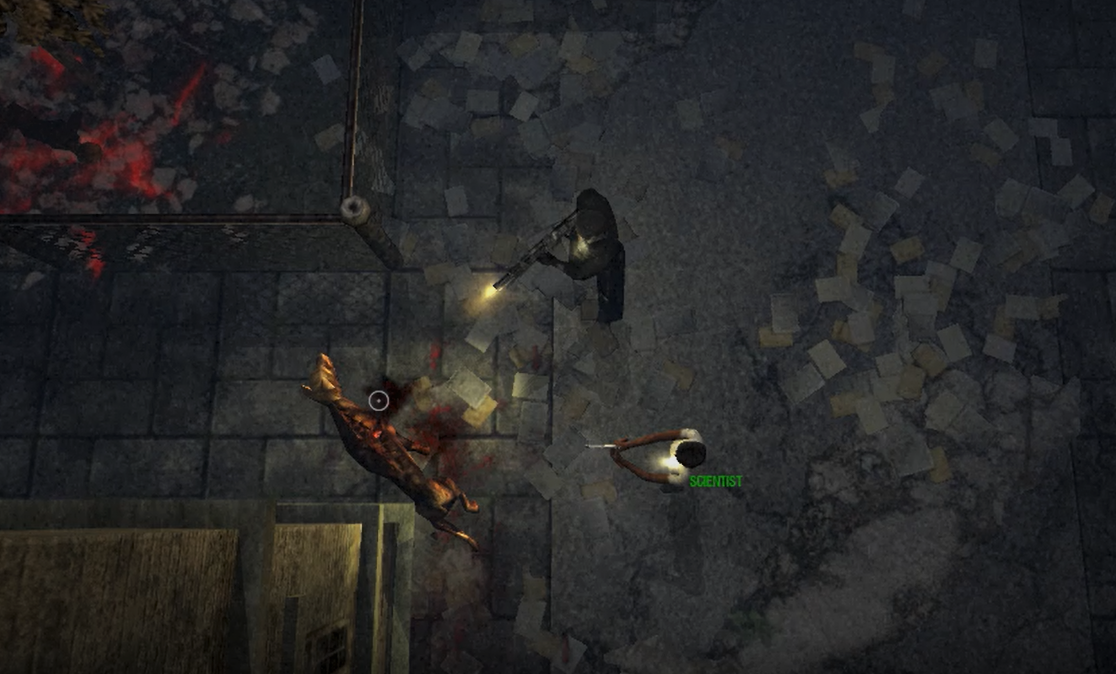
Best Grinding Zone is near the soldiers (seen at top of this lesson).
On the southern block of the westernmost street, is a pile of cars and trucks parked close enough together to contain zombies for a while, aided by firepower from the nearby soldiers.
Students who do not mind losing some experience points to the soldiers can complete the mission faster by staying near this spot as much as possible. Run around the block to lure the agro; squeeze through the cars and join the soldiers; then open fire. Grenade Launchers work well here.
Useful Tip:
- Don't forget to make contact with the soldiers. Two of them must speak before this mission requirement is fulfilled. Best time to get them to talk is after circling the block to lure agro into the pocket formed by the nearby parked cars (described above). There should be a lull before the zombies catch up and trap themselves behind the cars. During this time, stand next to the soldiers until they speak.

Click for larger version.
14 - BABY BLUES
- Type: Search & Rescue
- Goal: Find Miranda, convince her to return
- Zombies: White Zone Population
- Aggro: High
- Suggested Weapons: Hammerhead, AA-12, Street Dog
- Difficulty Level: Challenging
High agro and a reluctant Miranda make "Baby Blues" one of the most difficult search-and-rescue missions.
Students are tasked with finding a woman suffering postpartum depression, who has run away from Secronom Bunker. Her friends have an idea where she may be but not a very solid idea, since there are three widely spaced mission areas:
- The closest is 3 down and 4 right in a Black Zone. We were unable to find Miranda here.
- The second closets is 6 up and 3 left in a White Zone. We found Miranda here.
- The farthest is in the extreme northeast zone of Fairview, 6 up and 4 right from Secronom Bunker. We did not search here, having already found Miranda.
The basic strategy will be familiar to students who have completed any previous search-and-rescue mission.
Enter the mission area and run around the block, seeking Miranda in the open streets. Fend off agro with a grinding weapon.
Miranda is relatively easy to find in the second mission area, standing on the street near an alley. If you do not see her, listen for the sound of fighting as you run down the street.
After finding Miranda, lure zombies away, so that she will speak.
Even with Miranda's help, it is impossible to fight off the agro. She may speak once or twice with zombies nearby, but that is not enough to complete the mission.
It is not necessary to lead the agro around the perimeter of the mission area.
Usually, this is the safest way to outrun agro, but it is possible to circle only the block where Miranda is located and still have time for her to speak before the zombies catch up.
Miranda is the most reluctant of any search-and-rescue target.
She will speak a dozen times before deciding to return to Secronom Bunker.
She may say two or three sentences every time the vicinity is clear of zombies. This means it will be necessary to draw agro away from her four-to-six times.
The biggest challenge of "Baby Blues" is staying alive long enough for Miranda to make up here mind.
The Dead Frontier wiki states that agro in this mission is "near infinite," but we found it manageable.
The real problem is the prolonged risk from repeatedly luring the agro away. There are several tight squeezes (between cars, through bushes) where it is easy to get blocked by zombies. Going round the block once or twice is no great risk, but eventually the law of averages catch up.
Useful Tips:
- The alley next to Miranda is a dead end. We thought we could leave the zombies behind and get to her by entering the building and coming out in the alley. This worked (more or less - we had to fight some zombies inside the building), but when we got back outside, Miranda started repeating previous bits of her conversation.
-
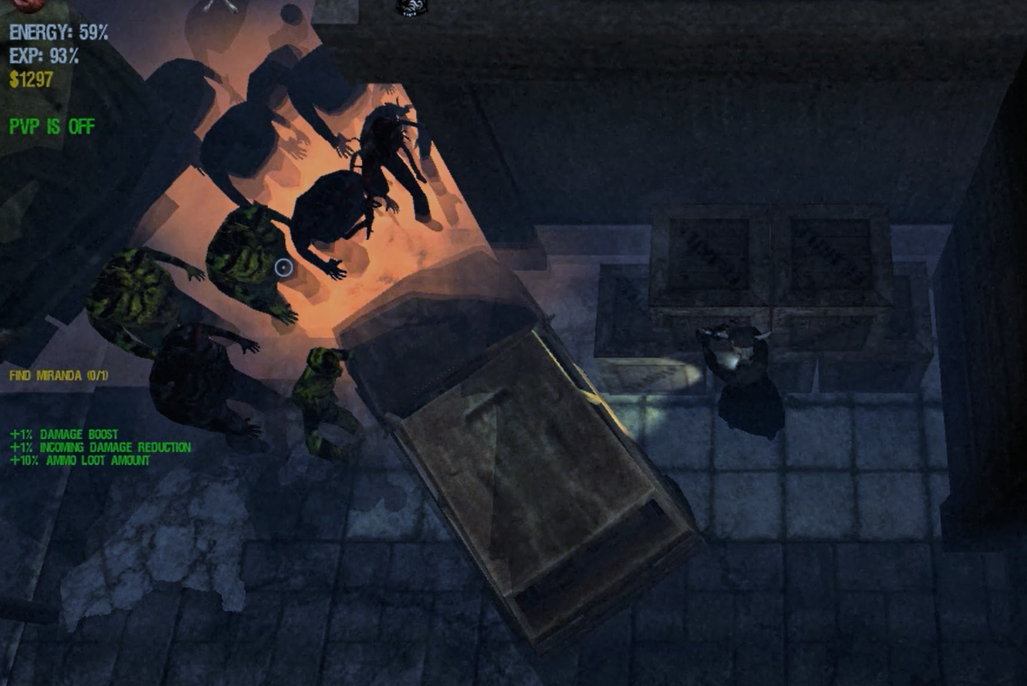 On the southwest corner of the mission area, a car is wedged against a building, with a truck next to it (see full-size image). After completing the mission, it is possible to run between the vehicles, which will trap most of the zombies for a while, providing an opportunity to grind the horde for more experience.

15 - EXTINGUISH
- Type: Kill & Loot
- Goal: Exterminate four Flaming Flesh Hounds, loot their blood samples
- Zombies: Red Zone Population, Flaming Flesh Hounds
- Agro: Maximum
- Suggested Weapons: XLGunner-8 and Marksman
- Difficulty Level: Extremely Challenging
""Extinguish" is one of the most difficult Secronom Bunker missions.
Flaming Flesh Hounds are the most dangerous Black Zone Mini-Boss. Killing four of them is no small task. Learn more here.
Bring plenty of medicine, ammunition, and spare armour for the long trip.
The mission area is a considerable distance south, in the eastern border of Fairview. The last thing a students wants is to walk back to Secronom Bunker to restock supplies or get medical attention.
Even if a wounded student is equipped to build an outpost near the mission area, he/she will find that market prices for medicine, repairs, and ammunition are astronomical.
A powerful grinding weapon with high DPS and knockback is strongly recommended.
We normally eschew Gau-19s and Wraith Cannons as overkill, but they will come in handy for this mission.
Otherwise, use at least a Vulcan or, preferably, an XLGunner-8.
A Marksman rifle will do for shooting at a single Flaming Flesh Hound if a student is lucky enough to isolate one or trap one behind a fence.
Recommended Strategy:
Agro is intense. Isolating individual Flaming Flesh Hounds by circling the area is difficult if not impossible.
The mission area does include three adjacent fenced areas: a tennis court and two fenced buildings. These can be used in several ways:
- Lure Flaming Flesh Hounds into the tennis court and grind them while shielded from most agro. The tennis court is a tight fit with Four Flaming Flesh Hounds; if the situation becomes too dangerous, move on to #2.
- Lure one Flaming Flesh Hound out of the tennis court. Circle the court while attacking the lone target. Potential Pitfall: Other zombies may interfere; more Flaming Flesh Hounds may get out of the court. So move on to #3.
- Run inside the fence around the building immediately north of the tennis court. With luck, the Flaming Flesh Hounds and other zombies will be stuck outside the fence, making it possible to shoot them with a grinding weapon.
- If too many zombies get inside the fence, exit the fence around the first building and enter the fence around the second building, immediately north. Again, try to get in without being followed, so that you can shoot the Flaming Flesh Hounds through the fence.
- If too many zombies get inside the fence around the second building, exit and run around the block, circling back to the tennis court. Repeat the previous steps as necessary.
Useful Tips:
- Students who cannot afford the recommended weapons will need to use a speed boost and/or join a hunt with other students.

16 - JUST BORROWING THEM
- Type: Looting
- Goal: Obtain ten laptops
- Zombies: Red Zone Population
- Agro: none
- Suggested Weapons: Dual Blade, Ironsight
- Difficulty Level: Easy
"Just Borrowing Them" is another easy looting mission.
There is little or no agro, and the laptops can be found in easily spotted vans and flatbed trucks. These trucks and vans practically litter the streets, often located side by side, which makes for quick looting.
There are four mission areas, but a student need visit only one to complete the mission. The closest area is five zones down from Secronom Bunker.
This area contains 15 trucks and vans. Not every one contains a laptop, but if a student comes up short, he/she can enter and exit the hospital on the southeast block, then re-search the vehicles in the parking lot or nearby on the street.
"Just Borrowing Them" is an ideal mission to attempt with silent Melee weapons.
The zombies in the mission area are docile unless provoked. By using Melee, it is possible to complete the mission without resorting a grinding weapon at all.
The Dual Blade is well suited to this mission, which takes place in a Red Zone with Long Arms and Rumblers. We recommend equipping two Rage Implants, so that the Dual Blade can kill Red Rumblers with a single critical hit.
For students who use firearms, the Ironsight is a perfect choice - it can one-hit-kill Red Long Arms and Red Rumblers without implants or damage boosters. Otherwise, make due with a Marksman or a Doubleshot.

17 – CHEMICAL IMBALANCE
- Type: Looting
- Goal: Obtain ten containers of chemicals
- Zombies: Red Zone Population
- Agro: None unless provoked
- Suggested Weapons: Dual Blade, Ironsight, Doubleshot
- Difficulty Level: Slight
"Chemical Imbalance" is another straightforward looting mission.
Students gather ten containers of chemicals from vans and flatbed trucks located in three low-agro mission areas.
There are only two reasons we do no rate this mission "easy."
- It is a considerable distance from Secronom Bunker.
- The percentage of trucks containing chemicals is very low.
The mission is set in three Red Zones on the far eastern border of Fairview, a considerable distance south of Secronom Bunker, though not quite as far as "Extinguish."
As with all long trips, there is the problem of making the journey, often through dangerous territory. Students need to bring enough ammunition and medicine to complete the mission but leave enough empty inventory slots to collect the chemicals.
Though the three mission areas are filled with numerous trucks, often side by side, only a few of them will yield chemicals. Students will likely visit all three mission areas or at least exit and re-enter an area several times to re-search previously looted trucks.
Agro is non-existent unless provoked.
With luck, a student could complete the mission without resorting to a grinding weapon.
Even if agro does spike, the Red Zone population is easy to handle for graduate students. Any grinding weapons with at least 110 proficiency should provide adequate protection, even chainsaws.
This is another mission in which silent Melee weapons are an obvious advantage.
A Spiker or a Corpse Crusher is good enough, but a Dual Blade is ideal, particularly if enhanced with two Rage Implants. This gives it enough Damage Per Hit to kill a Red Rumbler with a single critical hit.
Students who prefer firearms will find the Ironsight suitable - it can one-hit-kill a Red Rumbler without enhancement.
Otherwise, use a Marksman or a Doubleshot.
- Note: Except for Mutants, Red Rumblers have more health points than any species of zombie in the mission area. Being able to kill one with a single critical hit is not necessary, but it does make looting much quicker and easier.
Useful Tip:
- There are no exploding Rumblers or vomiting Long Arms in the mission areas. Looting with Melee and grinding with Chainsaws are safe.
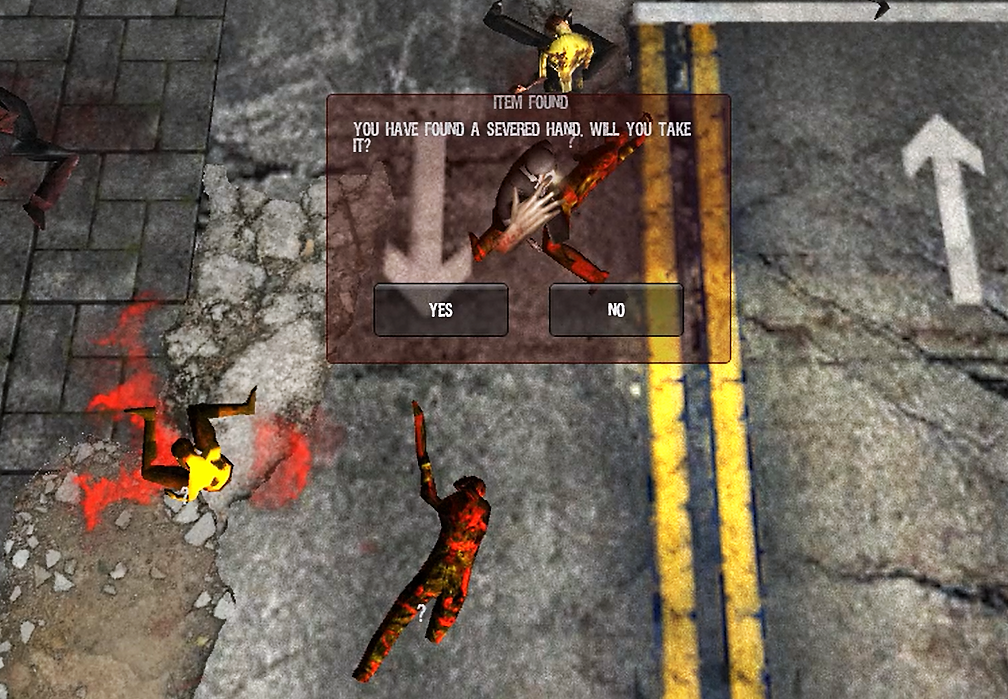
18 - DISARMED
- Type: Kill & Loot
- Goal: Exterminate Irradiated Long Arms, loot their bodies for two hands
- Zombies: Black Zone Population, particularly Irradiated Long Arms
- Agro: High
- Suggested Weapons: Best Available Grinding Weapon
- Difficulty Level: Challenging
"Disarmed" is essentially a remake of the "Need A Hand" mission in Dogg's Stockade.
Once again, someone has lost a limb - or, in this case, two. Students must travel one up and two left from Secronom Bunker to retrieve a guard's missing arms.
In the mission area, students will encounter high agro and grind through the crowd, targeting Irradiated Long Arms.
Eventually, some of the dead Irradiated Long Arms will drop loot. Circle the area to outrun the agro, then loot the bodies.
Sadly, the loot turns out to be severed hands rather than arms. The scientist who assigns the mission is disappointed to see how little is left of the missing limbs. Fortunately, students receive their mission reward anyway.
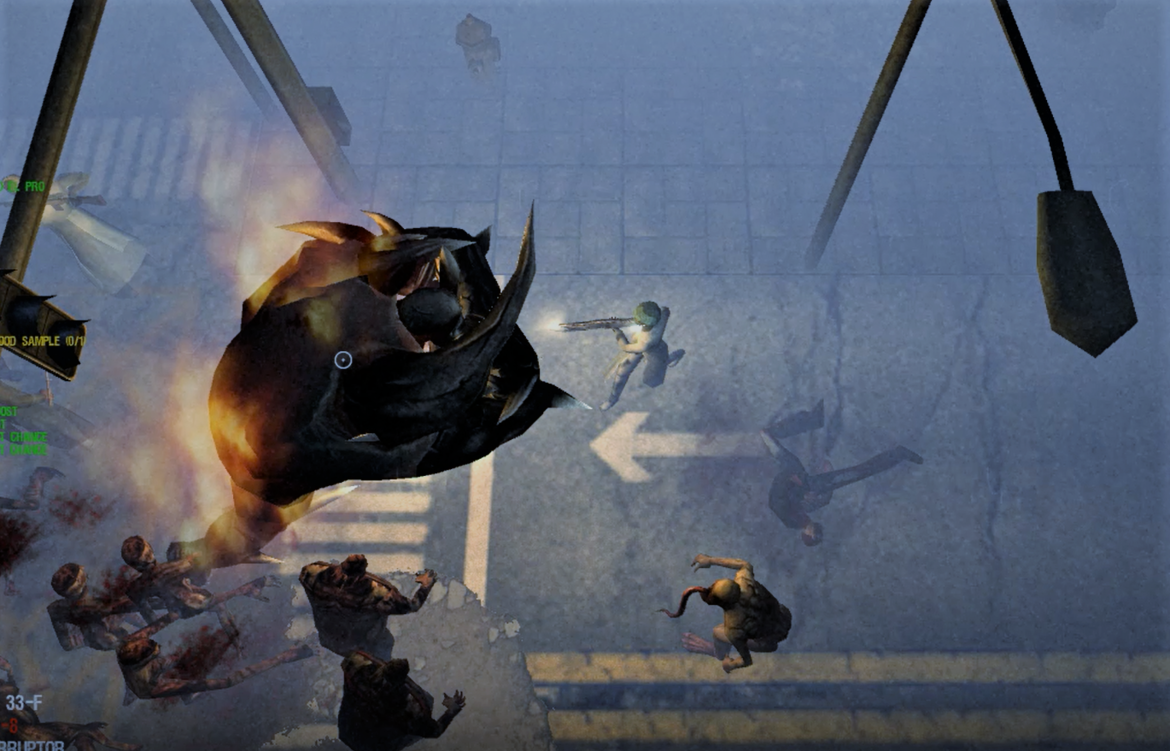
19 - WRATH OF THE WRAITHS
- Type: Boss Hunting
- Goal: Exterminate five Wraiths
- Zombies: Black Zone Population, Wraiths
- Aggro: Maximum
- Suggested Weapons: XLGunner-8, Corpse Erruptor
- Difficulty Level: Extremely Challenging
"Wrath of the Wraiths" is probably the most challenging of the Secronom Bunker missions.
Killing a Flaming Black Titan in "Need a Bigger Vial" is no picnic, but any competent student with decent weapons and a speed boost can do it.
Exterminating five Wraiths, on the other hand, remains difficult even with a speed boost.
The problem is pacing one's sprint, which is difficult when five targets, surrounded by smaller zombies, are all attacking at once.
The mission takes place in the northeast section of Fairview.
The mission area is a White Zone, with a dangerous population of Spiders, Tendrils, Black and Irradiated Long Arms, and Black and Irradiated Rumblers.
Use a speed boost, and head straight for the tennis courts.
In the southeast block of the mission area (near the intersection closest to Secronom Bunker) is a quartet of tennis courts. Using a speed boost, run into the first one as quickly as possible.
The fences will block most of the agro, making it easier to focus firepower on the Wraiths.
With luck, not all five Wraiths will get inside the court at once. It may be possible (at least temporarily) to battle two or three, shooting at the fourth and fifth through the fences.
Even with a speed boost, it is possible to run out of energy.
With a speed boost, it is possible to circle a quintet of Wraiths without too much risk. A grinding weapon with high knobckback makes it almost easy.
However, the mass of tentacles when all five Wraiths are clumped together makes it difficult to keep an eye on the only tentacle that counts - the striking tentacle.
Consequently, there is a temptation to sprint continuously in order to stay out of striking distance. Resist this temptation!
Just keep circling and grinding away until the Wraiths drop dead one by one.
A Mini-Gun is highly recommended for this mission.
Our volunteer used an XLGunner-8, which kept the Wraiths at bay and killed them in a reasonable amount of time (i.e., before the volunteer ran out of energy from sprinting too much).
In a group boss hunt, it is possible to complete this mission with a looting weapon.
When hunted by a group, the Wraiths will divide their attention among the hunters, sometimes splitting up and sometimes clumping together.
This provides some relatively safe time to recharge energy after sprinting. It also makes it possible to attack the Wraiths with a looting weapon, such as an Ironsight rifle or a Doubleshot revolver.
Stay as far away from the fight as possible, firing from a safe distance while the Wraiths are pursuing other hunters. When the Wraiths turn their attention to you, open your inventory or your map, which will protect you from attack. Wait until the Wraiths turn their attention back to the other hunters, then close the map or inventory and resume firing.
Remember: In a group boss hunt, more than five Wraiths will spawn.
The mission will remain dangerous from start to finish, and there may never be a time when there are no live Wraiths to interfere with attempts to loot the bodies of those that have been killed.
"Wrath of the Wraiths" is a potentially lucrative mission.
The only mission requirement is to exterminate five Wraiths; no looting is necessary. However, all five Wraiths will drop loot, which in a White Zone is likely to be fairly valuable weapons and/or armour.
Of course, trigger-happy students are likely to spend more on ammunition used to kill the Wraiths than they earn from the loot and the mission reward.
Untested Suggestion:
- In group boss hunts, hunters tend to congregate in the southwestern (lower left) tennis court, which in turn draws in the Wraiths. It may be possible to enter one of the other tennis courts and shoot these Wraiths through the fences. Although it is unlikely that no other Wraiths will follow a student into one of these courts, there is at least a chance that a student could avoid confronting five Wraiths simultaneously.
20 - MUTATE AWAY
- Type: Kill & Loot
- Goal: Exterminate ten Irradiated Long Arms, loot their blood samples
- Zombies: White Zone Population, particularly Irradiated Long Arms
- Aggro: high
- Suggested Weapons: Doubleshot or Marksman; Hammerhead; Immolator
- Difficulty Level: Slight
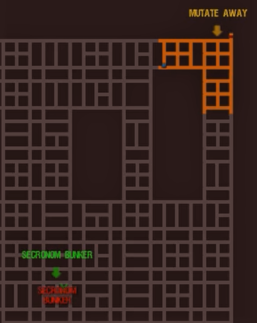 Set in three White Zones in the northeast corner of Fairview, "Mutate Away" is a straightforward kill-and-loot mission, which requires students to exterminate enough Irradiated Long Arms to collect ten blood samples.
There is plenty of agro, so "Mutate Away" is no walk in the park. Fortunately, the targets are relatively easy to kill, and the usual strategies for this kind of mission work here as well.
Students can either:
- Circle the perimeter of the area, killing Irradiated Long Arms along the way and collecting their blood samples during occasional lulls in agro.
- Trap the agro inside a walled or fenced area and blast away until ten lootable corpses are lying shoulder-to-shoulder. Lure agro away and then double back to collect all the samples at once.
We found the Hammerhead assault rifle more than adequate for fending off agro. The Immolator (or other high-end grenade launcher) will quickly kill enough Long Arms for students to bag their quota of blood samples, assuming they are packed closely together in some tight space, such as a parking lot.
Useful Tips:
- In the top-left mission area, the wall around the hospital affords an excellent spot to trap agro and bomb them with explosives.
- This is a good mission for grinding experience - just keep killing zombies even after collecting the blood samples.
SCIENTIFIC MINIMALIST GUIDE TO MISSIONS: CHAPTERS
Return to Introduction to Missions

Matriculated
1253187