
Matriculated
1253560
Scientific Minimalist Guide to Dead Frontier Missions: Precinct 13
The eighteen missions around Precinct 13 can be quite difficult, but this is mostly because survivors tend to leave this outpost before their builds are developed to handle the challenges here.
We recommend that students of Scientific Minimalist remain at Precinct 13 throughout their junior semester (levels 25-36) - long enough to amass at 150 stat and proficiency points (depending on their professions). Following this plan, students should have one Elite Looting Weapon (100 proficiency) and a mid-level Grinding Weapon, with stats in halfway decent shape.
Melee-Chainsaw students will find the limits of their dodging ability tested by high-aggro mission involving hordes of fast-movie zombies.
Students using some combination of firearms (such as Rifles and Submachine Guns or Pistols and Shotguns) may run into Reloading difficulties because of the limited ammo capacity of low- or mid-level weapons. Low Damage Per Second is also an issue.
Here are some weapons that students are likely to have in their arsenal while at Precinct 13:
Looting Weapons:
- Melee: Battle Axe/Katana (100 proficiency)
- Pistols: Alpha Bull (100 proficiency)
- Rifles: Dragon SVD (90 proficiency) or VSS Vintorez (100 proficiency)
- Note: Melee students may supplement their Katana with a low-level SL8 Rifle (20 proficiency).
Grinding Weapons:
- Chainsaw: Grinder (100 proficiency)
- Submachine Guns: Gramm M11 (40 proficiency), UMP (50 proficiency, Chicago Typewriter (70 proficiency)
- Assault Rifles: M16 (40 proficiency); Stell Aug (45 proficiency); XM8 (70 proficiency)
- Shotguns: Sega-20 (45 proficiency); Mannberg (60 proficiency)
The only Elite Grinding Weapon a Level 30 student is likely to own is the Grinder, which outperforms the other candidates in DPS. This becomes a factor mostly in large-scale extermination missions; lesser Grinding Weapons will suffice for Loot Missions and Search-and-Rescue Missions.
There are several different possible weapon combinations possible depending on which build a student is developing. The most common variations are:
- Melee-Chainsaw students with a Battle Axe/Katana and a Grinder, plus an SL8 Rifle and possibly a low-level Machine Gun for emergencies
- Rifle students with a Dragon SVD or a VSS Vintorez, with mid-level Submachine Gun, probably a Gramm M11 or an UMP. By hanging onto the Dragon for a while, it is possible to bypass the Gramm M11 sooner and get to the UMP. Neither of these has overwhelming killing power, but the latter is good enough for most missions at P13.
- Pistol students with a low-level Assault Rifle (M16 or Stell Aug) or a mid-level Shotgun (Sega20 or Mannberg). Fortunately, low-level Assault Rifles do more Damage Per Second than equivalent Submachine Guns. Shotguns shortchange DPS but offer better knockback. The Sega-20 is good for defensive purposes (Looting and Search-and-Rescue Missions), but if extermination power is needed, the Mannberg is clearly better (though its DPS still falls short of Assault Rifles and even Submachine Guns).
Ironically, by the time students are ready to leave Precinct 13 for greener pastures around Fort Pastor, their build will be approaching the point where they could easily finish all the missions. A senior around Level 48 could supplement his/her primary looting weapon with an M4 Assault Rifle, possibly even an HK 69 Grenade Launcher – pretty much an unbeatable combination in the environs around Precinct 13.
END THEIR SUFFERING
- Goal: Exterminator 250 zombie police officers
- Zombies: Cops, Leapers, Brutes, Spiders, Tendrils, Bloats, Blood Dogs, etc
- Aggro: moderate to high
- Suggested Weapons: SIC 550 with Chicago Typewriter; Kolt Anaconda with XM8 or Mannberg
- Alternative Weapons: Grinder with an SL8 (possibly a Battle Axe/Katana) and an M16
“End Their Suffering” asks students to exterminating 250 police officers that have fallen prey to the zombie virus. If students want to earn experience points from grinding, this is a good opportunity.
Ironically, this first mission in the Precinct 13 cycle is one that students may not want to attempt until they are almost ready to leave the outpost: depending on the build, it will be near the end of junior semester (around Level 32 or so) before the necessary weapons are in hand. Ambitious students may accelerate this timetable by relying on strategy and a little skill.
The aggro in this mission is variable: there will be lots of zombies attacking immediately, but the crowd will not become overwhelming unless provoked by Grinding Weapons. In fact, the mission’s true difficulty lies in the low percentage of officers among the infected. In order to dispose of 250, it is necessary to exterminate hundreds of other zombies, using a surfeit of ammunition in the process.
For these reasons, we recommend working with a quick-fire Rifle such as a the 75-proficiency SIC 550 (or a Dragon SVD or a VSS Vintorez if available). The SIC can one-hit-kill the officers at a rate of 1.5 per second without stirring up much aggro, and it is accurate enough to stand a chance of sniping targets among the crowd.
Pistols can also work, though their lower accuracy makes it more difficult to pick off the officers amid the other zombies. The 60-proficiency Kolt Anaconda Revolver should be able to one-hit-kill the zombie cops at a rate of 1.5 per second, but students using Automatic Pistols instead of Revolvers should use the 90-proficiency Desert Fox, which is tailor made for this mission – able to one-hit-kill the undead officers at a rate of 2 per second.
Students can attempt this mission with a Battle Axe/Katana and a Grinder, but it will be hard to pinpoint the cops. It will be necessary to dive into the horde and risk taking damage. This can work with great armor, lots of medication, and/or high endurance, but we recommend it only for students who enjoy a challenge. Otherwise, Melee-Chainsaw students are advised to add a rifle to their build – the 20-proficiency SL8 is just good enough (though a bit slower than the recommended Rifles, it can one-hit-kill the officers, and its larger ammo capacity is good for students with low Reloading stat).
The best strategy is to use obstacles or walls to split the crowd. Move near an entrance and lure small groups through, where they are easy targets. This strategy will work, but it is a slow process.
Another option is to circle the the mission area. There is a building in the middle of the block that seems to be a police station – there will probably be a higher percentage of officers in the vicinity. By moving around the block quickly, students can leave the hordes behind and pick off the strays as they catch up. The more spread out the zombies are, the better chance of sniping just the officers. By relying on quiet weapons, students can exterminate the zombie cops without attracting too many Spiders and Tendrils.
All of this advice is based on the assumption that students want to complete the mission quickly by targeting the officers. Student who want to grind everything in sight can blast away with the highest powered weaponry they have.
Low-level Machine Guns and Shotguns will not be very effective at exterminating the crowds (the Gramm M11 Submachine Gun, the M16 Assault Rifle, and the Sega-20 Shotgun work better as secondary weapons to knock back the zombies before returning to a looting weapon. For actual grinding purposes, use a Chicago Typewriter Submachine Gun, an XM8 Assault Rifle, or a Mannberg Shotgun, at minimum.
We think it is a waste to spray ammunition into crowds of two dozen zombies only to kill one or two officers; we prefer to do as much damage as possible with a chainsaw before switching to a machine gun. If things get too hot, make a run for it, switching to rifle to snipe the zombie cops as they follow.
“End Their Suffering” would be much easier with a Heavy Machine Gun or Grenade Launcher - an HK 69 Grenade Launcher would be ideal, but most junior-level students in Precinct 13 will probably not be working on Explosive Proficiency yet. Nevertheless, it is possible to beat this mission without heavy firepower. Just be prepared for a lengthy firefight.
Fortunately, the zombie cops themselves are relatively easy to kill. As the mission goes on, the percentage of officers increases; if students stay alive that long, they will be able to bag their quota with the suggested mid-level weapons.
FAMILY FIRST
- Goal: Loot a Photo
- Zombies: Leapers, Brutes, Spiders, Tendrils, Bloats, Blood Dogs, etc
- Aggro: mild but annoying
- Weapons: Grinder with a Battle Axe/Katana & SL8
- Alternate Weapons: Dragon SVD with Gramm M11; Alpha Bull with Sega-20 or M16
The wife of the Precinct 13’s captain has gone missing. The mission goal is to find some clue to her whereabouts – which turns out to be a photo.
This is one of the dull missions in Precinct 13. The four mission areas are quite a long walk from the outpost, and the search for the clue can take forever. Fortunate students may find the photo in the first mission area; more likely, the search will extend into the other areas.
There is no particularly interesting challenge about “Family First”; it is simply an endurance test.
Though the Dead Frontier Wiki Missions page indicates high aggro, our research parties have encountered little, except for those times when we failed to silence a Siren before she screamed.
There is, however, a high percentage of zombies who will show interest, hovering around to interfere with looting.
Use a Battle Axe/Katana to put down Common Zombies quietly. A Nodachi would be better, one-hit-killing annoying Blood Dogs. Use a Rifle against Bloats.
If aggro does spawn, a Grinder should be able to clean it up.
Stick with this mission. Though the search for the photograph can be boring, the loot in the area is decent for a junior-level student, in terms of food and medication.
Rifle and Pistol students should manage quite nicely, with low-level grinding weapons in case of emergency.
FIND SABRINA
- Goal: Loot a body
- Zombies: Leapers, Brutes, Spiders, Tendrils, Bloats, Blood Dogs, etc
- Aggro: moderate but persistent, sometimes high
- Suggested Weapons: Battle Axe/Katana with Grinder
- Alternative Weapons: Dragon SVD with Gramm M11; Alpha Bull & Sega-20 or M16
This is a Loot Mission disguised as a Search-and-Rescue Mission: although the stated goal is to find Sabrina, she is not a living character wandering the mission area; instead, a loot spot will reveal her corpse.
Like “Family First,” this mission is an exercise in tedium, only worse. The odds of finding Sabrina’s body in any individual loot spot are small, and accessing loot is an exercise in frustration because of the persistent aggro, including packs of Blood Dogs.
Nevertheless, this mission can be accomplished with typical Precinct 13 weaponry. Though a Nodachi to one-hit-kill the Blood Dogs would be a boon to Melee students, the Battle Axe/Katana will provide some small opportunity to loot quietly.
Rifles and Pistols are more likely to draw unwanted attention, making it necessary to run around the block over and over again to lure the zombies away from a targeted loot spot.
The Grinder will handle most of the aggro, but if a Siren screams, the swarms will increase to overwhelming levels. Students may find themselves wishing for better equipment, preferably a Mini-gun to blow the hordes away.
REVENGE
- Goal: Meet the Captain and Exterminate 1000 zombies
- Zombies: Leapers, Brutes, Spiders, Tendrils, Bloats, Blood Dogs, etc
- Aggro: high
- Suggested Weapons: VSS with Chicago Typewriter; Alpha Bull with XM8; HK 69 Grenade Launcher
- Alternative Weapons: Grinder with SL8 & M16
- Specialty Build Suggestion: Grinder with Sega-20 & Mannberg
Like “End Their Suffering,” this is an extermination mission easier to accomplish when near the end of junior semester, with a build above Level 30. It is possible to succeed with a lesser build, but lower firepower could take forever to bag the required body count.
Although Scientific Minimalism strongly advocates for Chainsaws, we have to admit there are easier ways to get “Revenge,” which features heavy aggro that tests the limits of a Grinder. In fact, there are two reasons to attempt this mission without a Machine Gun:
- To save money on ammunition.
- To prove it can be done.
Actually there is a third reason: once the strategy becomes, the execution is easy (though lengthy and boring).
There are convenient fenced areas in the mission area. Trap the aggro on one side and grind through the fence with a Chainsaw.
There will be lulls, with no zombies attacking. Either move near the gate to lure some zombies through, or switch to a firearm to shoot the zombies through the fence.
For students who manage to position themselves safely on one side of the fence, the greatest challenge of this mission is Tedium. It would take over twenty minutes to kill off 1000 zombies with an M1 Garand Rifle firing once per second. A VSS Rifle or an Alpha Bull Revolver would speed up the process with their faster firing speeds.
Eventually, the bursts of aggro will seem like welcome relief from the monotony of easy grinding.
With this method, a student with a Grinder and even a small Rifle could complete the mission. Students using Rifles or Pistols instead of Melee and Chainsaws will probably have to switch to Machine Guns or Shotguns when aggro circumvents the fence – which could lead to even more aggro and mitigate the effectiveness of hiding behind the fence.
Obviously, high-powered weapons will do the job more quickly. Impatient students willing to spend big bucks on ammo can use a Chicago Typewriter or an XM8. For students using Grenade Launchers, an HK 69 would be ideal (if one is accessible at this point).
Shotgun students can manage with mid-level weapons. We have found that the Sega-20 (45 proficiency) and the Mannberg (60 proficiency) make a good combo. The faster firing speed of the Sega will hold off zombies on the street; the greater killing power of the Mannberg will more quickly whittle down the number of zombies.
For eccentric students interested in flaunting Conventional Wisdom by combining Shotguns and Chainsaws, this mission is a relative breeze: grind the zombies in the street with a Grinder; shoot the ones behind the fence with a Mannberg. Use the Sega-20 if needed for knockback against a pursuing crowd.
Students who do not like hiding behind the fence could grind near the revenge-crazed Captain Jackson, whose rapid-fire Shotgun will help kill off the 1000 zombies. We do not recommend this method, because the area near the captain is crowded, which may block attempts to dodge.
Students might also use the many obstacles in the streets to split up the crowds. During our last research expedition, we found a firetruck blocking nearly an entire street; only a thin trickle of zombies could get around it on either side. By leading zombies around the block and squeezing past the firetruck, we managed to lure the zombies into the sort of trap where even a Grinder could handle the flow.
At some point, it is necessary to make contact with Captain Jackson and wait for him to speak. This could take several tries when aggro is high, because he will stop talking when zombies approach. Run around the block to lure the aggro away; then return, as many times as it takes for the captain to finish. Best strategy is to find the captain immediately upon entering the area, before aggro has peaked.
FIND CHARLOTTE
- Goal: find Captain Jackson’s wife
- Zombies: Leapers, Brutes, Spiders, Tendrils, Bloats, Blood Dogs, etc; or Bones, Reapers, Small Bloats, etc (depending on the mission area)
- Aggro: high
- Suggested Weapons: Grinder with Battle Axe/Katana
- Alternative Weapons: Gramm M11 or UPM Submachine Gun; Sega-20 or Mannberg Shotgun; M16 Assault Rifle or higher
This is the conclusion of the four-part saga that began with “Family First.” To succeed, students must find Charlotte, the wife of Precinct 13’s Captain Jackson.
As usual, the mission is not complete until the missing person finishes speaking. Since there is much aggro in the area, Charlotte will often be too busy fighting to talk, which can be frustrating.
Lure the zombies away from her, then run around the block and return to Charlotte, who will speak during the lull before the crowd catches up.
Charlotte can be found in any of three areas: two are Orange Zones; one is a Yellow Zone. Therefore, “Find Charlotte” is a good mission to attempt shortly after arriving from Dogg’s Stockade: sophomore-semester equipment leftover from Dogg's Stockade will be up to the task of confronting the zombies in the Yellow Zone (Bones, Reapers, and Small Bloats).
A Grinder will fend off the aggro. Low-to-Mid Level Machine Guns and Shotguns will also suffice, because the goal is not to kill the zombies but simply to hold them at bay until Charlotte leaves the area. In fact, a skilled student might be able to finish this mission a good Looting Weapon.
Students who prefer to grind through the crowd to earn experience points may want to wait until bigger guns are available.
BATTERY ACID
- Goal: Loot ten car batteries
- Zombies: Bones, Reapers, Small Bloats, Blood Dogs, Irradiated, Burned, Sirens, etc
- Aggro: none
- Suggested Weapon: Battle Axe/Katana
- Alternative Weapons: M1 Garand Rifle or higher; Alpha Bull Revolver
For students wondering how their junior-semester build would have stacked up near Dogg’s Stockade, here is a chance to find out: this mission takes place in two Yellow Zones, populated by Reapers instead of Leapers, Small Bloats instead of large ones, and Bones instead of Spiders and Tendrils.
This mission is a cakewalk. The batteries are located in police cars, which are easy to identify - they can even be distinguished from other vehicles in the small GPS window in the upper right viewscreen, which displays loot-able vehicles as brightly colored.
Though identifiable, police cars are not exactly littering the streets. Students will probably have to visit both mission areas to find ten batteries.
There is virtually no aggro in this mission, which can easily be completed with only a Looting Weapon, whether Melee, Rifle, or Pistol. Just make sure to have something that will take out a Siren with a single shot/strike.
COMMUNICATION IS KEY
- Goal: Loot a radio from a police car
- Zombies: Leapers, Brutes, Spiders, Tendrils, Bloats, Blood Dogs, etc
- Aggro: minimal
- Suggested Weapon: Battle Axe/Katana
- Alternative Weapons: Dragon SVD ; Alpha Bull
This is like a shorter, easier version of “Battery Acid”: instead of looting batteries from ten squad cars, loot a single radio from one squad car.
“Communication Is Key” is situated in a slightly more dangerous area, inhabited by Spiders, Tendrils, and Leapers, but their presence is not much hindrance to completing the mission. Aggro is practically non-existent, unless a Siren screams.
Heavy-duty weapons are not required. Any decent Melee, Rifle or Pistol would do. Our research team managed to complete the mission with only a Katana. After finding the radio, our volunteer hung around the area and stirred up aggro, which he was able to dispatch with a Grinder, earning some easy experience points.
TENDRIL STRIKE
- Goal: Exterminate 50 Tendrils
- Zombies: Tendrils, Bones, Reapers, Small Bloats, Blood Dogs, etc
- Aggro: moderate to high
- Suggested Weapon: Grinder
- Alternative Weapons: UMP (or Chicago Typewriter); XM8; Mannberg
This adventure takes place in a Yellow Zone, with Bones, Reapers, and Small Bloats. Also present is a type of zombie not normally seen in these environs: Tendrils – lots of them.
A student must kill 50 Tendrils to succeed. This is a smaller number than other extermination missions in Precinct 13, but Tendrils are dangerous to junior-level students who have yet to acquire heavy-duty Machine Guns or Shotguns.
It is unwise to attempt this mission with sophomore-semester equipment from Dogg's Stockade. Our tests suggest using at least an UMP Submachine Gun (and preferably a Chicago Typewriter). This will require builds using firearms be near Level 35 (assuming a secondary grinding weapon is not leveled until after a primary looting weapon is in place).
On the other hand, Melee Chainsaw students should be ready a little bit past Level 20, as soon as they get their hands on a Grinder, which is the most powerful Grinding Weapon a junior is likely to possess during the semester at Precinct 13.
The Grinder can do the job if used with care. Exploit available obstacles. At the intersection toward the center of the southernmost street are several cars. Weaving in and out between them will split up the crowd into smaller, manageable groups. Stay near an exit to make a fast escape out of the mission area if necessary.
Aggro begins at a moderate level; then escalates fairly quickly. At first, a Grinder will easily handle the crowd, with Tendrils appearing only one or two at a time. Soon, however, there will be multiple Tendrils, which could score a strike if dodging skills are poor.
The Machine Guns students are likely to own while in P13 have between one-half to two-thirds the DPS of the Grinder. Plus, there are issues with ammunition capacity and Reloading, giving the Tendrils more opportunity to strike during pauses to reload. Students who remain at P13 past junior semester may have a Chicago Typewriter Submachine Gun or an XM8 Assault Rifle, either of which will make the mission easier.
OFFICERS DOWN
- Goal: Exterminate 500 zombies; find 4 officers
- Zombies: Tendrils (?), Bones, Reapers, Small Bloats, Blood Dogs, etc
- Aggro: Moderate to Heavy
- Suggested Weapons: VSS with UMP; Alpha Bull Sega-20 and/or Mannberg
- Alternate Weapons: Grinder with SL8 & M16 or higher
Like “Tendril Strike,” this event takes place in a Yellow Zone, with zombies familiar from Dogg’s Stockade. Therefore, “Officers Down” is a tempting opportunity to grind shortly after arriving in Precinct 13. Strangely, our investigative teams have reported seeing Tendrils in this mission, though they do not normally co-exist with Yellow Zone zombies.
Students will need to exterminate 500 zombies - a sizeable number for low-DPS weapons. Still, that’s half the quota from the “Revenge” mission, so upgrading to bigger guns is not as much an issue (though it certainly helps).
If using a Grinder, students may want to stay near the intersections at the four corners of the area. Kill zombies until the aggro becomes overwhelming; then leave and return. The aggro will reset, however briefly, creating another window of opportunity to kill off some Normal Zombies before the Bones and Reapers appear.
Our team found a small fenced-in tennis court, which they used for protection, grinding zombies who follow us in and using a Rifle to shoot through the fence at the others. This took a long time, but it was relatively safe.
Students with a mid-level Machine Gun or Shotgun will be in good shape. Even the low-level Gramm M11 can fend off most of the aggro, though its DPS is so slow that it will take an inventory’s worth of ammo to finish the mission. The UMP is a noticeable improvement.
Shotgun students will do well with a Sega-20 and/or a Mannberg. Like the Gramm M11, the Sega’s DPS is so low that it takes forever, but its knockback provides safety while the police officers stationed in the area help kill the zombies. The Mannberg offers less knockback, but kills faster; firing form the shelter of a tennis court would be an easy task.
Students who remain in Precinct 13 long enough to equip a Chicago Typewriter Submachine Gun or an XM8 Assault Rifle (both 70-Proficiency) will see significantly improved performance. The XM8 Assault Rifle offers the advantage of its large clip size (100 rounds of ammo), which overcomes limitation of low Reloading Stat - often still a problem for students during junior semester.
Students who have not raised Machine Gun Proficiency to 70 can get by with lesser Assault Rifles, even the M16/FM FNC/SA80/Mesa ACR (all the same weapon, with different names and appearances). The weakness here is the small clip size (30 rounds). Firing nearly nine times per second, these ARs will reload approximately every few seconds seconds, so if Reloading Stat is low, the guns will fire only in short bursts, followed by noticeable pauses.
Nevertheless, these low-level ARS can benefit Chainsaw students by providing brief knockback to cover a tactical retreat when aggro grows too strong. Blast away while sprinting from a sticky situation, thinning the hordes; then switch back to the Grinder when the crowd is back to a manageable level.
There are lulls in the aggro during which it is possible to switch to a slower weapon: Melee, Rifle, or Pistol. There is no sense spraying dozens of machine gun bullets all over the street to kill one or two zombies.
The four personnel in the mission, who appear together in a group, provide only minimal assistance: as they finish speaking, they bug out. It is possible, at least for a while, to circle near enough so that they help kill zombies, but our test runs indicate that coming too close to the personnel is inevitable, at which point they will speak and leave.
Wear good armor (including a spare if possible), and bring plenty of medication.
Students who re-attempt to this mission later, with a powerful Machine Gun or a Grenade Launcher will find the extermination process considerably easier. Despite the challenges, juniors can complete Officers Down with a Build slightly above Level 30.
We confirmed this recently with a test subject, who even completed part of the mission at Critical Health (which cuts stats in half) and still managed to survive. (Not that we recommend this as a course of action; we were just proving that it was possible.)
ITCHY SCRATCHY
- Goal: Find Dr. Adler
- Zombies: Leapers, Brutes, Spiders, Tendrils, Bloats, Blood Dogs, etc
- Aggro: mild
- Suggested Weapons: Grinder with Battle Axe/Kanata
- Alternative Weapons: Dragon SVC and UMP ; Alpha Bull and Stell Aug or Sega-20
Another Search-and-Rescue operation sends students in pursuit of a missing person, in this case a nutty doctor. All the usual rules apply: find Dr. Adler and listen, fending off zombies until he finishes speaking.
The search for Dr. Adler presents difficulties. “Itchy Scratchy” covers four mission areas, in any one of which the doctor may appear. Students are not likely to find him in the first area they enter; it is better to move on to a new area rather than scouring every inch of territory with a magnifying glass.
After Adler shows up, the mission does not get easier. Suffering from a mental breakdown, he tends to yammer on about his headaches before agreeing to leave. He is probably the most talkative of the Search-and-Rescue missing persons.
As usual, students will have to keep the zombies away from Adler so that he will speak. Fortunately, aggro in this mission is relatively mild, so students should be able to lead the zombies around some obstacles (bushes, cars) instead of circumavigating the entire block.
Melee and Chainsaw are ideal for this mission, picking off zombies quietly with the former during the search, then switching to the later to grind away the zombies attacking Adler. Low-level Submachine Guns, Assault Rifles, and Shotguns should do the trick as well. Students will not need massive killing power, only enough to keep the area around Adler clear for a few seconds at a time.
BLOOD HARVEST
- Goal: Loot ten blood samples from Tendrils
- Zombies: Tendrils, Bones, Reapers, Small Bloats, etc; or Tendrils, Leapers, Brutes, Spiders, Bloats, etc.
- Aggro: mild to moderate
- Suggested Weapons: Battle Axe/Katana with Grinder
- Alternative Weapons: VSS with UMP; Alpha Bull with Sega-20 or Stell Aug
This adventure can be difficult for Level 30 students who stick to the open streets, but finding a safe spot and using a little strategy can turn “Blood Harvest” almost into a cakewalk.
Note that the mission takes place in four areas: three are in Orange Zones; one is in a Yellow Zone, populated by less dangerous zombies encountered near Dogg’s Stockade. Students can use this Yellow Zone if they do not feel confident about defending themselves against rampaging Spiders, Brutes, and Leapers.
The mission goal is to loot blood samples from ten dead Tendrils, but not every dead Tendril will drop loot. Plan to kill a few dozen, depending on how things work out.
Aggro is mild initially. The first Tendril or two may arrive individually - they are easy to dispatch with a quiet Looting Weapon. After that, the numbers increase, to groups of five or six, at which time it is best to switch to a Grinding Weapon.
Try to stay in one place, so that all the bodies fall near each other. During the occassional break in aggro, students should be able to loot several blood samples one after the other. After an item is looted, there is usually a brief pause before aggro resumes. If bodies are close enough together, that delay may be enough to move to the next body and loot that one as well. It is unlikely to loot ten in a row like this, but three or four at a time is possible.
Eventually, there may be a massive wave of aggro. Students could exit the mission area and return, resetting the aggro to mild; however, any loot-able Tendril corpse will have evaporated.
Instead, we recommend taking advantage of the fenced-in sections our research team discovered near the center of this Yellow mission area, including a small tennis court. If a student can get inside the court, the zombies will enter in small numbers that can easily be dispatched with a Grinder or with mid-level Machine Guns or Shotguns.
At this point, the biggest concern becomes finding enough Tendrils to kill. It may be necessary to wander outside the safety of the tennis court to find more. By continually luring Tendrils into the court , students can complete the mission without heavy weapons.
Another option is to trap the zombies inside the tennis court and shoot at them from outside, then go inside to loot the bodies. This sounds easier than it is (it is hard to get that many Tendrils to voluntarily trap themselves), but it is worth a try.
Either a VSS Vintorez Rifle or an Alpha Bull Revolver would function well in this scenario; a Dragon SVD Rifle would also work, though it takes more shots to kill a Tendril. We do not recommend wasting box-fulls of Machine Gun ammo firing at trapped zombies; a Shotgun such as the Mannberg would do the job without using thousands of shells.
A Grinder and a Battle Axe/Kanata are ideal for this mission, leaving inventory slots empty of ammo so that there are enough spaces for ten blood samples. Start with the Battle Axe/Katana to keep things quiet, then switch to the Grinder when Tendrils begin appearing too fast and furious to whack one at a time.
Machine Gun students should do well enough with an UMP Submachine Gun or a Stell Aug Assault Rifle.
As for Shotguns, our test runs indicate that the Sega-20 offers sufficient protection from the Tendril swarms in the Yellow mission area; however, in the Orange Zones, the prevalence of Spiders made the Sega feel inadequate; a Mannberg would be a better choice in Orange Zones.
Aggro in this mission seems highly variable, depending. Our test subject completed this mission with an FM FNC Assault Rifle (basically, the M16 by another name), proving it was possible to survive in the open streets without an upper-level Machine Gun. He was able to do it, but just barely - the small clip size of the FM FNC , with the resulting frequent pauses to reload, was barely adequate. A second attempt, using a Corpse Shooter Revolver, resulted in virtually no aggro, and the mission was easily completed.
TENTACLES EVERYWHERE
- Goal: Loot a blood sample from a Wraith and find Captain Jackson
- Zombies: Wraith, Leapers, Brutes, Spiders, Tendrils, Bloats, Blood Dogs, etc
- Aggro: low to moderate
- Suggested Weapons: Grinder with SL8
- Alternative Weapons: VSS with Gramm M11; Alpha Bull with Sega-20 or M16
This is a challenge for junior-level students, but skill and strategy can compensate for the lack of heavy weapons. Students must loot a blood sample from a dead Wraith and talk to the precinct captain. The situation is complicated by aggro that begins slowly but builds up, making it difficult to focus on the target.
With a little practice, students can learn to kill Wraiths with Looting Weapons, whether Melee, Rifle, or Pistol. The problem is that Wraiths tend to be accompanied by aggro, which forces a switch to Grinding Weapons – without one, it could be difficult to survive in the open streets.
Typically, the Wraith will arrive in this mission before many other zombies, providing a brief window of opportunity. As long as she is alone or nearly alone, Melee-Chainsaw students can use a Grinder or even a Battle Axe/Katana.
Likewise, Rifle and Pistol students who have invested 100 Proficiency Points for either a VSS Vintorez Rifle or an Alpha Bull Revolver are adequately equipped to kill a Wraith, if their stats are in place – and if they can avoid aggro.
Whatever the primary weapon, resort to a grinding weapon if a mass of zombies shows up and surrounds the Wraith.
Fortunately, there are a couple of options for dealing with aggro without lots of firepower: isolate the aggro, or get help.
For the first option, our team took advantage of a fenced-in space in the mission area, where we trapped a large portion of the zombies, so that we could focus attention on the Wraith. Even better was a series of tennis courts: after luring a Wraith into one of these, we determined that even Melee-Chainsaw students can vanquish their opponent with relative assurance. When finished with the Wraith, students can easily pick off the aggro outside the tennis court’s fence with a Rifle or a Pistol.
To complete the mission, students also need to contact Captain Jackson. He and two other police officers will provide assistance, blasting the Wraith and any other zombies nearby. Students may need protection running through the streets. Mid-level defensive grinding weapons should suffice: a Gramm M11 Submachine Gun, an M16 Assault Rifle, or a Sega-20 Shotgun.
The second option for eliminating aggro is to get assistance from the officers. Stay near them while their weapons do most of the shooting. Make sure to land at least one shot/blow on the Wraith; otherwise, her corpse will disappear upon death, without becoming loot-able
Students who are wounded and fear they may not survive should go AFK (Away From Keyboard) by opening their inventory. Wait until the Wraith is nearly dead (her appearance will turn bloody, and she will flinch from every gunshot). Then return to the game to help finish her off.
Remember: if a student remains AFK when the Wraith dies, her body will not be loot-able. Under this circumstance, it will be necessary to leave the mission area and return to fight a new Wraith.
FIND JIM
- Goal: Kill a zombie and loot I.D. from its corpse
- Zombies: A Cop (i.e., a Male Zombie), Long Arms, Rumblers, Flesh Hounds, etc.
- Aggro: none unless provoked
- Suggested Weapon: Battle Axe/Katana
- Alternate Weapons: VSS; Alpha Bull
This is Kill-and-Loot Mission disguised as a Search-and-Rescue. The goal is to find Jim, a missing police officer, but he turns out to be a zombie; to complete the mission, exterminate him and take an I.D. from his corpse.
Sounds easy, right? After all, this is not the first mission like this. However, "Find Jim" tests nerves as no other P13 Mission does.
The action takes place in the Red Zones, inhabited by zombies that cannot be one-hit-killed the kind of weapons students carry during their junior semester, and the population density is so great that the area feels like a giant tinder box, waiting for a spark to ignite a firestorm.
Stealth is the key to success here. Sneak through the area quietly, and do not attack any zombies. Kill only in defense, and use only quiet weapons – preferably a Battle Axe/Katana.
Eventually, a Zombie Cop will arrive and attack. Kill him – again, using a quiet weapon - and then loot his corpse.
This later aspect is easier said than done. There are so many zombies packed in so tightly in the Red Zones, that one or more are likely to come lurking around, interfering with any attempt to loot the corpse.
Complicating this is the fact that it will take at least two hits from most looting weapons to kill the Rumblers and Long Arm Zombies in the area – in effect, doubling the amount of time needed to dispatch them. By the time one is dead, another will be wandering forward; after that one is dead, another will come, etc.
This can be very frustrating. The solution is this: do not stand and fight; instead, run around the block, luring zombies away from the corpse. Then circle the block to grab the loot before the pursuers catch up.
If this doesn’t work the first time, try again until it does.
Melee Weapons are recommended here, because they are less likely to attract “hearing-range aggro” than firearms. During a test run, our volunteer finished this mission with only a Katana, never reaching for anything more powerful.
MOW THEM DOWN
- Goal: Meet police officers and exterminate 750 zombies
- Zombies: Leapers, Brutes, Spiders, Tendrils, Bloats, Blood Dogs, etc
- Aggro: high
- Suggested Weapons: VSS with UMP; Alpha Bull with Stell Sega-20 and/or Mannberg
- Alternative Weapons: Grinder with SL8 and/or Stell Aug
This is another Extermination Mission, bigger than “End Their Suffering” and “Officers Down,” though not as huge as “Revenge.” As in “Officers Down,” there is a group of police officers in the area; the difference is that this time the officers will remain to help exterminate the hordes (as Captain Jackson did in “Revenge”).
Typically, a Grinder will be adequate upon first entering the area, but as the aggro swells, a Machine Gun may become necessary. Firearms are necessary only if students insist on running through open streets, pursued by hordes of zombies, including speedy Tendrils and Spiders.
We recommend that students use the strategies that worked in “Revenge”: hang out near the officers and let them help grind through the aggro; dodge around obstacles in the streets to split the crowds into smaller groups; or take cover near a fenced parking lot.
Our field tests indicate that, if staying near the officers, it is best to circle the car just north of them. This will continually split the horde into smaller group of zombies and give the police a chance to shoot them. This is especially useful for Chainsaw students who do not have a firearm to kill a Bloat from a safe distance.
Hiding behind a fence, it is possible to pick off the zombies one by one with a Rifle, even a low-level one. Melee-Chainsaw students will probably have only an SL8 Rifle at this point, which will take forever to do the job (assuming ammunition does not run out first). An M1 Garand is better, if Rifle Proficiency is up to 40 - a big “if” for Melee students during junior semester at Precinct 13. Students who opted to raise Rifle or Pistol Proficiency first will be in better shape with a VSS Vintorez or an Alpha Bull.
The fence method is pretty near infallible, though it can be a tedious slog with single-fire weapons (it would take over 15 minutes to kill 750 Normal Zombies with the M1 Garand – and not all the zombies in this area are Normal). A faster-firing SV Dragon or VSS Vintorez Rifle would speed up the process, as would an Alpha Bull Revolver.
From time to time, Melee-Chainsaw students will need to switch back to the Grinder when aggro penetrates the safety of the parking lot. If ammunition runs low, edge toward the entrance to lure small groups of zombies inside, where the Grinder can handle them.
Machine Guns will accelerate the killing, but the cost of ammunition will exceed the cash reward for the mission. Our research indicates that the Gramm M11 Submachine Gun is inadequate on this mission: it does not offer much more protection than a Grinder, and it kills zombies so slowly that fails against multiple Spiders and/or Tendrils. With two boxes of .38 ammo - a total of 1,600 rounds - our test subject managed to bag only 150 zombies before switching to the more powerful UMP, which did the job much better.
An M16 Assault Rifle has more DPS than either of those Submachine Guns, though the small clip size will cause problems for students with low Reloading. A Stell Aug is somewhat better, and an XM8 is better still (100 rounds per magazine) if Machine Gun proficiency is up to 70.
Shotgun students will find that the Sega-20 offers good knockback in the open streets but suffers from a weakness of the Gramm M11: it kills the zombies too slowly, giving them a chance to mass and overwhelm. A Mannberg, with its higher DPS, is much more effective, especially in a situation that does not require knockback – such as shooting through a fence.
An HK 69 Grenade Launcher is ideal for the mission, if students are lucky enough to have one this semester.
At some point, it is necessary to make contact with the officers and let them speak a few times. Typically for these missions, the personnel prefer not to speak while there are zombies present, so it’s best to make contact early, before aggro maximize. Otherwise, students will need to circle the block a few times, luring the aggro away and letting the officers speak in the lulls before the zombies catch up.
SCREAM AWAY
- Goal: Loot ten blood samples from Sirens
- Zombies: Sirens, Leapers, Brutes, Spiders, Tendrils, Bloats, Blood Dogs, etc
- Aggro: moderate to high
- Suggested Weapons: Grinder with Katana
- Alternative Weapons: Dragon SVD with UMP; Alpha Bull with Sega-20 and/or Mannberg
This adventure is similar to “Blood Harvest,” except that students will be looting blood samples from Sirens instead of Tendrils. This complicates the matter. Not all of the same strategies will work. The problem is not so much that the Sirens create aggro but that they are slow and get lost in crowds of zombies. Additionally, the low percentage of loot-able corpses makes it nearly impossible to complete the mission before heavy aggro arrives. Therefore, Grinding Weapons are not ideal – they will kill lots of zombies but not necessarily Sirens. It is preferable to use a Looting Weapon that can pinpoint targets and one-hit-kill them as quickly as possible.
The mission seems relatively simple at first. Despite the constantly screaming Sirens, the aggro is not unmanageable – at least initially. There are plenty of zombies, but it is possible to grind them with a Grinder Chainsaw, an UMP Submachine Gun, or a Sega-20 Shotgun; there will even be a pause or two to loot a corpses.
However, in the long run, Machine Guns and Shotguns (especially with low Damage per Second, such Gramm M11 and Sega-20) are not recommended for exterminating the mission targets – many Sirens must die before loot starts dropping, and those weapons take too long. A Stell Aug Assault Rifle or a Mannberg are slightly better, but aggro eventually becomes too severe to make a stand in the open streets.
At his point, students should run around the block, hopefully leaving the aggro behind, then return to loot the dead Sirens. This process, which needs to be repeated several times, can grow wearisome.
Unfortunately, the usual solution for this problem – finding a fenced-in space –does not work with this particular zombie. Yes, there is a convenient tennis court in the mission area, but Sirens are too slow to follow through the entrance, and they are not likely to spawn within the fences. So, it will be necessary to head back outside the fence to hunt them down. And then once again, other zombies will intervene between the targets.
The best luck our volunteer had (when recently completing this mission during a field test) was with a sidewalk that extends eastward from the westernmost street, running in between the wall of a house on the north and two fenced houses on the south. It’s a thin space that prevents too many zombies from squeezing in; many of them get caught in the fences.
Moving back and forth in this space, our research subject picked off the zombies with a single-shot weapon. Any end-game rifle (i.e., able to one-hit-kill a Siren) will work, but faster-firing weapons such as the Dragon SVD and the VSS VIntorez are preferable. An Alpha Bull Revolver is also effective.
Once the Sirens do start dropping loot, it is relatively easy to kill enough of them to get the quota of blood samples. Students may need a Grinding Weapon to knock back some Tendrils and Spiders, but for the most part, the mission could be completed with a Battle Axe/Kanata at this point.
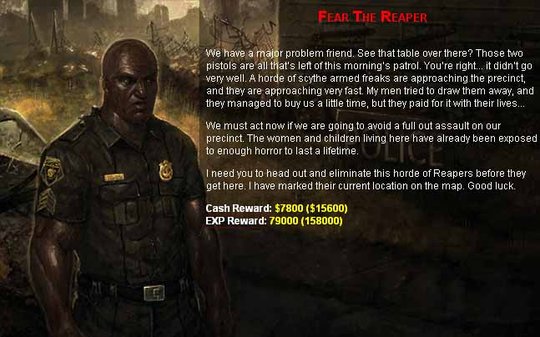
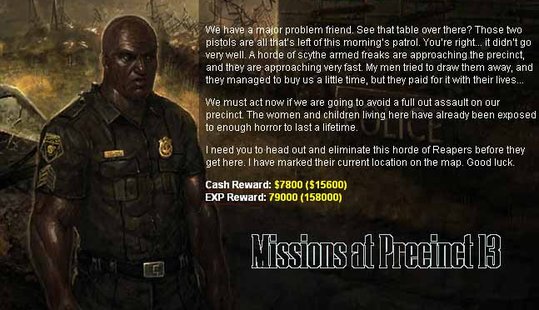
FEAR THE REAPER
- Goal: Exterminate 100 Reapers
- Zombies: Bones, Reapers, Small Bloats, Blood Dogs, etc.
- Aggro: moderate to high
- Suggested Weapons: Hawk Op96 or M82A2; Desert Fox
- Alternate Weapons: Dragon SVD; VSS Vintorez; Alpha Bull
This is a deceptively difficult mission. Set in the old Yellow Zone, “Fear the Reaper” sounds inviting to students recently arrived from Dogg’s Stockade. The zombies are slower and less lethal, and the targets – Reapers – are dangerous up close but easy to pick off at a distance. So what’s the problem?
Basically this: The Reapers are such lumbering creatures that they tend to fall behind the other zombies, which form a short of shield, making it difficult to pick off the mission targets. For a Melee-Chainsaw student, it is almost impossible to penetrate the crowd and grind the Reapers without taking major damage.
What is the answer?
One option is to continuously move around the block, hoping the swarm will thin out as it follows, providing an opportunity to target the Reapers. From time to time, a lone Reaper will appear ahead of the crowd, where it can easily be dispatched.
The other option is to head for a fenced-in tennis court in the mission area. The zombies will mass outside the fence, and the Reapers will press up close, pushing the others aside and making themselves easy targets for firearms.
Our weapon recommendations for this mission are based on the Reapers Health Points (200) and a calculation of how long it would take to kill them using different Rifles or Pistols. The winners in this regard are the 80-proficiency Hawk Op 96 and the 90-proficiency M8 2A2, very slow rifles that do over 100 Damage Per Hit, once per second, adding up to kill a Reaper every 2 seconds. (These are essentially the same rifle except that the M82A2 has more than double the ammo capacity.)
Also good for this mission is the 90-proficiency Desert Fox Automatic Pistol, which fires twice per second, with each critical hit inflicting 50 damage points - enough to kill a Reaper every two seconds.
Lagging slightly behind are the Alpha Bull Revolver (100-proficiency) and two rifles, the Dragon SVD (90-proficiency) and the VSS Vintorez (100-proficiency), all of which fire 1.5 times per second and kill a Reaper every 2.25 seconds.
The Battle Axe/Katana is poor for this mission, requiring three hits at once-second intervals to kill a Reaper. A Nodachi will strike and kill as fast as the M8 2A2 – assuming students can get close enough to use it.
Aggro in this mission runs moderate to high. Hordes of zombies will appear almost immediately in the mission area, but their pace should remain relatively calm as long quiet weapons are used. Absent Spiders and Tendrils in this zone, the only fast attackers are Bones, Blood Dogs, and Zombie Dogs, and they will not go into a complete frenzy unless provoked by a rapid-fire bullet barrage.
Nevertheless, students will need a backup grinding weapon in case a Siren screams. Low- to mid-level Machine Guns (Gramm M11, UMP) and Shotguns (Sega-20, Mannberg) should provide enough knockback to provide safety, but they are not strong enough to do a very effective job at extermination.
As with the “End Their Suffering” advice listed above, these suggestions are for students attempting to complete the mission quickly by focusing on the target zombies. Students who want to grind away at everything on screen might want to come back to “Fear the Reaper” when their build is almost ready to leave Precinct 13 for Fort Pastor. A100-proficiency Machine Gun could cut a swath through these zombies with ease.
INFECTION
- Goal: Loot 10 medical supplies
- Zombies: Leapers, Brutes, Spiders, Tendrils, Bloats, Blood Dogs, etc.
- Aggro: low (with some spikes?)
- Suggested Weapons: Battle Axe/Katana with Grinder & SL8
- Alternative Weapons: Dragon SVD with Gramm M11; Alpha Bull with M16 or Sega-20
This is an easy mission: simply loot ten boxes of medical supplies from easily identifiable trucks.
This mission is spread out over three areas, but our research indicates it is not necessary to visit all of them. In fact, exiting and re-entering an area resets the loot spots, so it is possible to simply re-loot the same two or three trucks to find ten boxes.
The Dead Frontier Wiki indicates that “Infection” features high aggro, but I encountered almost none when I recently completed the mission with a mid-level alt using Melee and Chainsaws. There was one spontaneous aggro spike when I re-entered an area and another spike caused by a Siren I failed to kill before it screamed; the Grinder handled both - no need for a Machinegun. Other than that, I was able to loot un-harassed.
ABattle Axe/Katana is ideal for this mission,dispatching zombies without drawing any attention. Keep a Rifle handy for the occasional Bloat.
If an aggro spike does occur, a Grinder can probably clear it. If the aggro seems to be sustaining itself, lead the zombie crowd away from the truck, then run back. Hiding on the side of the truck away from the returning zombies will provide enough time to loot the medical supplies.
THE LOST PENDANT
- Goal: Loot a pendant
- Zombies: Leapers, Brutes, Spiders, Tendrils, Bloats, Blood Dogs, etc.
- Aggro: low buy annoying, some spikes
- Suggested Weapons: Battle Axe/Katana with Grinder & SL8
- Alternate Weapons: Dragon SVD with Gramm M11; Alpha Bull with M16 or Sega-20
This is another boring mission at Precinct 13 – which is to say, it is difficult but not particularly challenging. The goal is to find the Lost Pendant, but the chance of it showing up in any particular loot spot is slim to none, meaning that students have to search and search and search – and then search some more.
The aggro is low-to-non-existent, but the population density of the zombies is high enough to impeded looting. Students will probably have to kill at least a few to get to each loot spot - without arousing attention from other zombies in the area.
Melee-Chainsaw students can use a Battle Axe/Katana to pick off zombies quietly. A Grinder will handle any aggro spikes.
Those using firearms stand a higher risk of inflaming aggro. Low-level Machine Guns and Shotguns should offer enough protection; heavy firepower is useful only for grinding through the aggro spikes for experience.
Just keep looting and looting. “The Lost Pendant” is spread over four areas; it is usually necessary to visit more than one to find what the pendant.
SCIENTIFIC MINIMALIST GUIDE TO MISSIONS: CHAPTERS
Return to Introduction to Missions
The Zombie Shopping Mall