
Survival Build: Farmer with Melee-Chainsaw, Shotgun, Rifle
|
Survival Build with Farmer
Preferred Stats at Level 105 |
||||||||||||||
Notes:
|
This unconventional build seeks to ameliorate a common problem for students: as they level up, they require more expensive food and medication, forcing them deeper into Fairview to find better loot - but also forcing them into confrontations with more dangerous zombies. Remaining in safer zones can drive students to bankruptcy, because they are unable to feed and heal themselves on the poor loot available.
Survival Builds provide options for overcoming this dilemma, allowing students to feed themselves with the food they create as a Farmer and to minimize the need for healing by raising Endurance and using Strength-based armor to avoid damage. Thus, students will be able to survive in the Western areas of Fairview - even after reaching Level 75, when their food and medicine requirements rise to more expensive levels.
This makes Survival Builds particularly advantageous to "mules" - students who purchase items in Secronom Bunker (where costs are low due to the abundanct loot nearby) and take them west to outposts where costs are higher, selling them at markup.
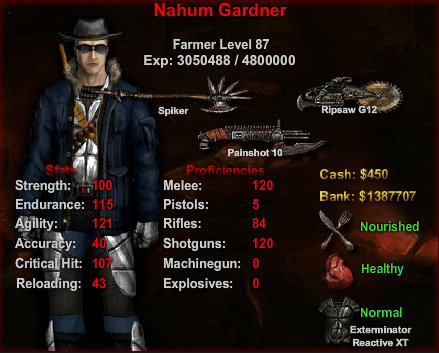
On this page, we explore two kinds of Survival Builds, an affordable Economy Version with 100 Strength (illustrated above) and a more expensive Luxury Variation with 50 Strength. In these builds, Melee and Rifles are used for looting; Chainsaws for grinding; and Shotguns for defense.
Mixing Shotguns with Chainsaws and Rifles is an unusual combination, because most Rifles and all Chainsaws require a large investment in Critical Chance; this offers no benefit to Shotguns, which instead depend on Strength. Maxing both Strength and Critical Chance could be a heavy burden on a student, but there are ways to make the combination work, as we will demonstrate below.
We prefer Bolt-Action Rifles with large ammo capacity and Very High Accuracy (the SL8, the MSG-9) because they rely less on stats that this build cannot afford to develop. Carbine Rifles are a less comfortable fit because they are not as accurate as Bolt-Action Rifles. Students can experiment with Carbines if they prefer the faster firing rate; however, when the need arises for a firearm that shoots more than one round per second, shotguns will do the job.
Pistols (both Automatics and Revolvers) could theoretically replace Rifles, but Pistols are less suitable because they need more stat points in Accuracy and Reloading. Also, Pistols are a poor choice for a third weapon, because after a student reaches Level 50 it will take forever to raise Proficiency high enough to equip a decent pistol. (Revolvers are commonly combined with Shotguns, in order to keep Critical stat low, but that is not the case in this build.)
Students interested in more firepower and not concerned with ammo costs could use Heavy Machine Guns and Mini-Guns instead of Shotguns. The large ammo capacity of these weapons is suitable for builds with low Reloading.
However, since the addition of the limited edition (and ultra-expensive) Buckblast 99A shotgun (which delivers 243 damage points per second), shotguns can now match the Damage Per Second of high-end grinding weapons such as making the Vulcan Mini-Gun, the Hammerhead Assault Rifle, and the Street Dog Submachine Gun.
Bottom Line
Students with a Survival Build will be able to feed themselves while minimizing expenses for ammunition, medicine, and repairs. This build is excellent for students interested in turning a profit by purchasing items cheaply in Secronom Bunker and carrying them to Western outposts for resale at higher prices.
This lesson includes the following chapters:
- Survival Build Weapon Progression
- Undergraduate Program: Build Development Levels 1-32
- Undergraduate Program: Economy and Luxury Variations Levels 32-50
- Postgraduate Program: Economy and Luxury Variations after Level 50
- Survival Build: Hybrid Option with Pistols, Shotguns & Melee
UPDATE: Zombies such as Bloats and Mothers no longer explode when killed with Melee weaponry. Consequently, there is little if any need to raise Rifle proficiency before reaching Level 50, especially since the Farmer profession comes equipped with a Mini-41 rifle. The following text contains outdated references to equipping an SL8 rifle at Level 36 or 46, which is no longer necessary to deal with exploding zombies.
SURVIVAL BUILD: WEAPON PROGRESSION
Weapon progressions for Economy and Luxury variations of the Assault-Hybrid Build are shown below. The builds are the same until senior semester, when they diverge after Level 35. Boldface indicates recommended weapons. Non-boldfaced listings represent optional weapons that students may avoid because of small ammo capacity or excessive cost.
Survival Build Weapon Progression to Level 32:
- Mini-41 & random stat boosters
- Iron Pipe (20 – Level 4)
- Kris and or Shovel (50 – Level 10)
- Ronan Pro (60 – Level 12)
- Sabre & Steel MS800 (80 – Level 16)
- Sega 20 (45 - Level 25)
- Battle Axe/Katana & Grinder (100 – Level 29)
- Mannberg (60 – Level 32)
Economy Version Weapon Progression after Level 32:
- SL8 (20 - Level 36)
- Nodachi & Steel 090 (110 – Level 38)
- Sweeper (80 - Level 42)
- Ripsaw G12 & Spiker (120 – Level 44)
- USAN 12 (100 - Level 48)
- AA-12 (110 - Level 50)
- Painshot (120 - Level 55)
- M1 Garand (40 - Level 65)
- Chesterfield/M21/Glacial Warfare (50 - Level 70)
- MSG-9 (60 - Level 75)
- SIC 550 (75 - Level 83)
- M82A2 or Dragon SVD (90 - Level 90)
- VSS Vintorez (100 - Level 95)
- 577 Rex (110 - Level 100)
- Ironsight and/or Marksman G8 (120 - Level 105)
Luxury Variation Weapon Progression after Level 32:
- Corpse Blaster (100 - Level 40)
- Corpse Crusher & Corpse Grinder (110 – Level 42)
- SL8 (20 - Level 46)
- Ace Barrel or Buckblast 99A (120 – Level 50)
- Dual Blade & Grinder X3 (120 – Level 55)
- Rebellion (40 - Level 65)
- Hawk OP96 (80 - Level 85)
- M82A2 (90 - Level 90)
- Corpse Piercer (110 - Level 100)
- Ironsight, Marksman G8, Worg or Longshot (120 - Level 105)
The divergence between the two progressions is the result of Strength allocation: The Economy Version raises Strength to 100; the Luxury Variation caps Strength at 50, which prevents the use of some Shotguns but spares stat points for Reloading and/or Accuracy.
Students will note that the Survival Build holds off raising Rifle proficiency longer than the Critical Builds combining Melee and Rifles. There are two reasons for this:
- Farmers begin with a Mini-41 rifle, which can be used during freshman semester while investing proficiency points for other weapons.
- Unlike Critical Builds, which use Sub Machine Guns, Survival Builds use Shotguns. Shotguns are better than Sub Machine Guns for targeting individual zombies. Although not ideal for this purpose, there are some models that can be deliver enough DPH to be used as a single-shot weapon, making Rifles less important in the Survival Build.
SURVIVAL BUILD: UNDERGRADUATE PROGRAM
Zombie Hunter University's Undergraduate Program guides students in use of their builds from Levels 1 to 50, illustrating weapon choice and stat allocation to ensure that points are in place to optimize weapons when they are equipped.
Level 50 is the cut-off for completing the undergraduate version of a build and earning a Bachelor's Degree. After Level 50, build development is extremely slow. Whatever long-term goals a graduate has, the undergraduate build is the one that will be used for considerable time.
|
Survivor Build with Farmer
Preferred Stats at Level 32 |
||||||||||||||
Notes:
|

The theory behind the Survival Build is that the student predominantly uses Melee and Chainsaws, resorting to firearms only when necessary. Therefore, weapon proficiency focuses on optimizing Melee and Chainsaws; character stats focus on raising Strength and Endurance.
- Strength enables the use of Chainsaw, Shotguns, and Heavy Armour. The Economy Version with 100 Strength can equip all high-end Shotguns and Heavy Amour; the Luxury Variation is limited to Shotguns and Armour that can be equipped with 50 Strength.
- Endurance will keep students alive longer, so they will need to heal less often. In a very real sense, this increases the value of medicine: although the percentage of improvement remains the same for each dose, the number of actual health points restored is greater. (Think of it like this: If you have 50 health points, a 10% increase adds 5 health points; if you have 100 health points, a 10% increase adds 10 health points.)
By using Melee and Chainsaw, students can keep ammo cost down. Because of their slower firing rate, Shotguns are more economical crowd-control weapons than Machine Guns, offering similar knock-back while expending less ammunition.
In order to allocate points to Strength, Endurance, and Critical Chance, this build neglects Accuracy and Reloading until other stats are in place. This is why we recommend equipping Rifles and Shotguns with this Build:
- Rifles, especially bolt-action rifles with Very High Accuracy, will operate effectively without base stats in Accuracy; Rifles with large ammunition capacity, such as the SL8 and the MSG-9 are less reliant on Reloading.
- Shotguns have only Average Accuracy, but this is good enough for firing into crowds. Depending on their firing speed and magazine size, some Shotguns can fire for ten seconds or more without reloading.
SURVIVAL BUILD: UNDERGRADUATE PROGRAM
WEAPON & STAT DEVELOPMENT BY OUTPOST
The following outpost-by-outpost breakdown will clarify why certain weapons should be equipped to use in certain zones and why some might not work so well until there is time to optimize their stats. While examining the information, remember that these suggestions are not rigid; there is room to adjust for personal style and skill-set.
The Stat and Proficiency Allocation of the Economy Version and the Luxury Variation is identical through the first three outposts, so only one chart apiece is necessary for Nastya's Holdout, Dogg's Stockade, and Precinct 13. When we reach Fort Pastor, we will show two charts to illustrate the differences that emerge between the two versions.
We usually suggest that students spend one semester of 10 levels at each of the first three outposts. However, because the Survival Build uses the Farmer profession, which comes with neither stat nor proficiency boosts, students may spend a slightly longer semesters at Nastya's Holdout: 12 Levels instead of 10. This will allow more time to equip the necessary weapons before moving on.
This creates a dilemma because, like all students, Farmers will see their food and med requirements go up when they reach Levels 11. Farmers can supply their own food, but their food production will not advance until Levels 15. Consequently, there will be two levels when they are remaining in an area where proper food and meds are not easily lootable, and their own food production will not yet fill the gap.
Nevertheless, part of the point of the Survival Build is that it relieves the pressure on students to advance into more dangerous territory in search of more nutrious food and more effective medication. Students could theoretically spend much longer intervals in each outpost, looting as much food as possible until their own food production catches up to their needs.
|
Survival Build at Nastya's Holdout
Levels 1-12 (Freshman Semester) |
|
|
STATS |
PROFICIENCIES |
|
Strength: 25 + 10 = 35 |
Melee: 5 + 55 = 60 |
|
Endurance: 25 |
Pistols: 5 |
|
Agility: 25 + 25 = 50 (74) |
Rifles: 0 |
|
Accuracy: 25 |
Shotguns: 0 |
|
Critical Hit: 25+ 20 = 45 (69) |
Machine Gun: 0 |
|
Reloading: 25 |
Explosives: 0 |

Recommended Weapons:
- Melee: Iron Pipe, Shovel and/or Kris
- Chainsaw: Ronan Pro
- Rifle: Mini-41
Recommended Armour:
- Non-Strength: Sports Armour
- Strength: Flak Jacket
Weapon Progression:
- Raise Melee to 20 for the Iron Pipe, then 50 for Kris and/or Shovel, then 60 for Ronan Pro.
Stat Progression:
- Add 30 points to Agility
- Add 20 points to Critical Hit
- Add 5 points to Strength
The early progression of Survival Build #4 simulates that of Critical Build #3; however, there are some differences, because this build starts with a Farmer instead of a Boxer. This means that students will not receive the boxer's bonus points in Melee or Strength.
Consequently, it will take two more levels to raise proficiency for Melee and Chainsaw weapons, compared to the Boxer; students will also need to add 5 points in Strength to equip the Ronan Pro. This should be done after working on Agility and Critical Hit.
The Iron Pipe is sufficient to one-hit-kill normal Blue Zone Zombies; the Kris knife does the same but with a faster striking speed. The Shovel is useful when moving on to more dangerous territory, and the Ronan Pro adds grinding ability.
|
Survival Build at Dogg's Stockade
Levels 13-22 (Sophomore Semester) |
|
|
STATS |
PROFICIENCIES |
|
Strength: 35 + 5 = 40 |
Melee: 60 + 20 = 80 |
|
Endurance: 25 |
Pistols: 5 |
|
Agility: 50 + 45 = 95 (119) |
Rifles: 0 |
|
Accuracy: 25 |
Shotguns: 0 + 30 = 40 |
|
Critical Hit: 45 (69) |
Machine Gun: 0 |
|
Reloading: 25 |
Explosives: 0 |

Recommended Weapons:
- Melee: Sabre
- Chainsaw: MS Steel 800
- Rifle: Mini-41
Recommended Armour:
- Strength: Flak Jacket, SN-42
Weapon Progression:
- Raise Melee to 80 for the Sabre and the MS Steel chainsaw
- Raise Shotgun to 30 (though one will not be equipped until proficiency reaches 45).
Stat Progression:
- Add 10 to Agility
- Add 5 to Strength to equip MS 800 chainsaw
- Add 35 points to Agility
First, raise stats and proficiency to equip a Sabre and a Steel MS 800 chainsaw. Then put Melee on hold while raising Shotgun proficiency in anticipation of equipping a Sega-20 upon leveling up to 25 (which will not happen until after leaving Dogg's Stockade).
With no points invested in Rifles, Farmers can use their Mini-41 rifles to pop bloats.
|
Survival Build at Precinct 13
Levels 23-32 (Junior Semester) |
|
|
STATS |
PROFICIENCIES |
|
Strength: 40 + 10 = 50 |
Melee: 80 + 20 = 100 |
|
Endurance: 25 (49) |
Pistols: 5 |
|
Agility: 95 + 5 = 100 (124) |
Rifles: 0 |
|
Accuracy: 25 (49) |
Shotguns: 30 + 30 = 60 |
|
Critical Hit: 45 + 35 = 80 (104) |
Machine Gun: 0 |
|
Reloading: 25 (49) |
Explosives: 0 |

Recommended Weapons:
- Rifle: Mini-41
- Chainsaw: Grinder
- Melee: Battle Axe/Katana
- Shotguns: Sega-20, Mannberg
Recommended Armour:
- Strength: SN-42
Weapon Progression:
- Raise Shotgun to 45 for the Sega-20
- Melee to 100 for the Battle Axe/Katana and the Grinder
- Raise Shotgun to 60 for the Mannberg
Stat Progression:
- Add 20 to Critical Hit
- Add 10 to Strength for the Grinder
- Add 15 to Critical Hit
Survival Build #4 approximates Critical Build #3 at this point, except it uses Shotguns instead of Sub-Machine Guns. In both cases, students will be doing most of their looting and grinding with Melee and Chainsaw, using Rifles (in this case, Mini-41) to pop dangerous zombies from a distance, and pulling out a grinding weapon to get out of overwhelming aggro situations.
SURVIVAL BUILD AT FORT PASTOR
ECONOMY & LUXURY VERSIONS
As noted previously, the Economy Version and the Luxury Variation of the Survival Build diverge after reaching Level 33 at Fort Pastor. We will examine both versions, starting with the Economy Version, which is the version that most impoverished students will be able to afford. The Economy progression is designed to minimize investment in expensive armor, weapons, and ammunition. Students with large bank accounts may prefer the Luxury Variation.
|
Survival Build: Economy Version at Fort Pastor
Levels 33-50 (Senior Semester) |
|
|
STATS |
PROFICIENCIES |
|
Strength: 50 + 50 =100 |
Melee: 100 + 20 = 120 |
|
Endurance: 25 + 32 = 57 (81) |
Pistols: 5 |
|
Agility: 100 (124) |
Rifles: 0 + 20 = 20 |
|
Accuracy: 25 (49) |
Shotguns: 60 + 50 = 110 |
|
Critical Hit: 80 + 8 = 88 (112) |
Machine Gun: 0 |
|
Reloading: 25 (49) |
Explosives: 0 |

Recommended Weapons:
- Melee: Nodachi, Spiker
- Chainsaw: Steel 090, Ripsaw
- Rifle: Sl8
- Shotgun: Sweeper, USAN, AA-12
Recommend Armour:
- Strength: Reative SLX, Reactive XT800, Exterminator Reactive, Exterminator Reactive XT
Weapon Progression:
- Raise Melee to 110 for for Nodachi & Steel 090
- Raise Shotgun to 80 for Sweeper
- Raise Melee to 120 for Spiker & Ripsaw
- Raise Shotgun to 110 for the AA-12
Stats:
- Add 8 to Critical
- Add 12 to Endurance
- Add 30 to Strength for Sweeper
- Add 10 to Endurance
- Add 20 to Strength for USAN-12
- Add 10 to Endurance
At Fort Pastor, Survival Build #4's Economy Version maxes out Strength for Shotguns, caps Critical at 112, and adds remaining points to Endurance.
With 120 proficiency points in Melee and another 110 in Shotguns, only 20 points are left over for Rifles. Fortunately, the Farmer comes equipped with a Mini-41 rifle, so it is possible to hold off investing those points until this semester. Farmers will have to decide for themselves whether they are comfortable enough with a Mini-41 to forgo the advantages of the SL8 until now. Non-Farmers whose profession does not come pre-equipped with a rifle are advised to acquire an SL8 earlier in the build.
The Economy Version reaches Level 50 with the AA-12, which requires only 110 points in Shotgun proficiency. The AA-12 is so effective that it is debatable whether the most affordable 120-proficiency shotgun, the Painshot, is an improvement; the more expensive 120-proficiency Shotguns require only 50 points in Strength, so they better fit the Luxury Variation discussed next.
For these reasons, the Economy Version completes the undergraduate program without a 120-proficiency Shotgun. Fortunately, the AA-12 is an excellent weapon, with as much knockback as a Vulcan mini-gun (though much less DPS). It is more than sufficient near Fort Pastor and continues to perform well in Secronom Bunker.
By Level 50, the Economy Version of the Survival Build is well-suited to the challenges ahead. The equipment may lack long-range firepower against threats in Black and White Zones (not to mention the Wasteland), but graduate students with competent dodging skills will have little trouble upon graduating from Fort Pastor to Secronom Bunker.
|
Survival Build: Luxury Variation at Fort Pastor
Levels 33-50 (Senior Semester) |
|
|
STATS |
PROFICIENCIES |
|
Strength: 50 |
Melee: 100 + 10 = 110 |
|
Endurance: 25 + 75 = 100 (124) |
Pistols: 5 |
|
Agility: 100 (124) |
Rifles: 0 + 20 = 20 |
|
Accuracy: 25 (49) |
Shotguns: 60 + 60 = 120 |
|
Critical Hit: 80 + 8 = 88 (112) |
Machine Gun: 0 |
|
Reloading: 25 + 7 = 32 (56) |
Explosives: 0 |

Recommended Weapons:
- Melee: Corpse Crusher
- Chainsaw: Corpse Grinder
- Shotgun: Corpse Blaster, Ace Barrel, Buckblast 99
- Rifle: SL8
Recommend Armour:
- Strength: Corpse Carapace
- Non-Strength: Exterminator Mesh GT, Nomad Mesh
Weapon Progression:
- Raise Shotgun to 100 for Corpse Blaster
- Raise Melee to 110 for the Corpse Crusher & Corpse Grinder
- Raise Rifle to 20 for SL8
- Raise Shotgun to 120 for Ace Barrel and/or Buckblast
Stats:
- Cap Critical at 88
- Max out Endurance
- Dump remaining points into Reloading
The Luxury Variation offers a viable - albeit expensive - way to complete a Survival Build without maxing Strength. This somewhat limited option depends on a large outlay of cash for the few high-dollar shotguns that require only 50 points in Strength.
In terms of stat allocation if not expense, the Luxury Variation is easier to achieve than the Economy Version. Capping Strength at 50 makes it possible to max Endurance and add some points in Reloading before Level 50. This will benefit firearms in the long run.
The Strength limitation prevents the use of several Shotguns and Heavy Armours. Fortunately, the limited-edition Corpse Carapace can be equipped with 50 Strength. The big advantage of the Carapace is its 400 Durability, which makes the armour ideal for long trips between outposts, where repairs would be expensive if not impossible. The armour absorbs only 50% in damage (same as the SN-42), but having maxed Endurance, students will be able to withstand enormous damage with this much protection.
Non-Strength armours are also available, such as the Exterminator Mesh GT, the Nomad Mesh, and the Shinobu Mesh. These armours tend to be more expensive than their strength-based equivalents, but they are still less expensive than the Corpse Carapace.
The Luxury Variation develops Shotgun proficiency more rapidly than the Economy Version, because limited Strength creates a long gap between the 60-proficiency Mannberg and the 100-proficiency Corpse Blaster - a gap that should be filled as soon as possible. Fortunately, there is no delay for stats to catch up with proficiency - the Strength to equip the Corpse Blaster at Level 40 is in place as soon as the Grinder chainsaw is equipped at Level 29. (Compare this to the Economy Version, in which the 100-proficiency USAN was not added until Level 48, because it was impossible to raise Strength to 100 sooner without shorting other stats.)
Unlike the Economy Version, the Luxury Variation raises Shotgun proficiency to 120 before Level 50, in order to equip the two 120-proficiency shotguns that require only 50 stat points in Strength. In order to do this, it is necessary to use 10 points that were invested in Melee in the Economy Version.
Therefore, the Luxury Variation caps Melee at 110 during the undergraduate program. Fortunately, this limit is hardly noticeable, thanks to the Corpse Crusher and the Corpse Grinder. These 110-proficiency weapons are equal or nearly equal to the Spiker and the Ripsaw. With them in hand, there is no need to raise Melee to 120 until money has been saved for at least a Dual Blade and a Goretooth.
The Luxury Variation's 50-Strength Shotguns lack the knocback of the AA-12, but make up for it with higher DPH and DPS. The Ace Barrel delivers enough Damage Per Hit to work as a single-shot weapon; the Buckblast lives up to its name, with enough Damage Per Second (243) to stand beside the best Sub Machine Guns and Assault Rifles. Either one is strong enough to face the challenges around Secronom Bunker.
COMPLETING THE UNDERGRADUATE PROGRAM
Upon reaching Level 50, a student acquires the Stat & Proficiency points needed to complete Zombie Hunter University's Undergraduate Program for this build - a necessary requirement for earning Bachelor's Degree in Scientific Minimalism. Graduates may hone their skills in Fort Pastor while finishing up their degree requirements, or they may embark upon advanced studies in Secronom Bunker.
SURVIVAL BUILD
POSTGRADUATE PROGRAM
After earning a Bachelor's Degree in Scientific Minimalism, students interested in postgraduate studies may pursue a Master's Degree through the next 55 levels. Progress will be much slower, because only 2 proficiency points and 1 stat point are allocated for each new level.
Advancing to Secronom Bunker is a requirement for completing the Master's Program. Graduate students may tarry for awhile at Fort Pastor, developing their build further before embarking for more dangerous climes; however, Level 70 is the absolute latest during which students should remain in the outpost. After reaching Level 71, students will require Level 71 food and medicine, which cannot be found in Orange Zones. At this point, looting in Black and White Zones farther east becomes necessary.
During the undergraduate program, Scientific Minimalism recommended using the minimum weapon needed to defeat local threats. In Secronom Bunker, however, it is wise to equip the most powerful weapons possible. The two undergraduate versions of this build will be sufficient to loot and grind successfully while adding more expensive weapons and developing the build further.
The following charts showcase the postgraduate development of the Survival Build through Level 105, so that students can see what weapons and stats will be in place upon earning their Master's Degree.
|
Survival Build: Economy Version at Secronom Bunker
Levels 51-105 (Master's Program) |
|
|
STATS |
PROFICIENCIES |
|
Strength: 100 |
Melee: 120 |
|
Endurance: 57 + 43 = 100 (124) |
Pistols: 5 |
|
Agility: 100 (124) |
Rifles: 20 + 100 = 120 |
|
Accuracy: 25 (49) |
Shotguns: 110 + 10 = 120 |
|
Critical Hit: 88 (112) |
Machine Gun: 0 |
|
Reloading: 25 + 12 = 37 (61) |
Explosives: 0 |

Recommended Weapons:
- Melee: Dual Blade
- Chainsaw: Goretooth
- Shotguns: Painshot
- Rifles: M1 Garand, Chesterfield, M82A2, Dragon SVD, VSS Vintorez, 577 Rex, Ironsight, Marksman G8
Recommend Armour:
- Strength: Bio Reactive, Tatakau Reactive
Weapon Proficiency:
- Raise Shotgun to 120 for Painshot
- Raise Rifle to 120 for Ironsight
Stats:
- Add 43 to max Endurance
- Dump remaining points into Reloading
Implants:
- 2 Rage Implants
- 2 Survival Implants
During the post-graduate period, the Survival Build's Economy Version continues to raise Endurance while maxing Shotguns for the Painshot, then switches to Rifles, eventually acquiring a VSS Vintorez.
Meanwhile, students should be carrying at least a Spiker, a Ripsaw, an AA-12, and an SL8. Our clinical trials, performed with volunteers, have proven that this weapon combination can succeed in Black and White Zones. Students will not be able to one-hit-kill the stronger Long Arms and Rumblers in the area, but the silence of Melee is very valuable while looting.
Despite conventional wisdom, Chainsaws can still be used for grinding, though it will be necessary to switch to firearms against exploding zombies. Even if a student is caught in the blast from a Rumbler, high Endurance and Strength Armour will offer sufficient protection to prevent serious injury from a single incident.
The SL8 rifle will not be very effective against the local zombies, but its use will be similar to that seen when students first encountered Small Bloats: wound the exploding zombies almost to death with Melee before stepping back to finish them off with the rifle.
The Painshot has slightly lower DPS than the AA-12. However, the Painshot's slower firing rate uses less ammunition and delivers more Damage Per Hit - enough to function as a single-shot weapon instead of a rifle. The Painshot can provoke agro, but if used carefully, it can finish off Irradiated (i.e., exploding) Rumblers. The trick is getting close enough to deliver all the damage to a single target while staying far enough away to avoid the death blast.
After the Painshot, the Economy Version develops Rifles. Unfortunately, Reloading is so low at this point that when proficiency is in place to swap out the SL8 for an M24, the small clip size seriously impairs the new rifle's usefulness. For this reason we recommend skipping the M24 - the frequent pauses to reload create windows of vulnerability that can be avoided by using rifles with bigger magazines.
Ammo capacity can compensate for low Reloading. The M1 Garand is more powerful than the SL8, but its clip size is almost as small as the M24's. The Chesterfield, M21, and Glacial Warfare (three rifles with same performance but different appearances) offer only slightly larger clip size, but the MG9-9, with 20 rounds, is a must-have upon reaching 60 Rifle proficiency.
Like the M24, the Hawk OP96 suffers from small clip size; its big brother, the M82A2 (same DPH and DPS but more ammo capacity) is worth the extra expense. All high-end rifles (100 proficiency and over) fire enough rounds per clip to work well with few stat points in Reloading.
Implants
Reaching Level 50 opens up four slots to equip implants for the first time. Several different types of implants are available, but as with stats, it is better to focus on one or two capacities rather than three or four.
In general, we recommend first-generation implants because they are less expensive. For example, a single Violence Implant will increase DPH by twice as much as a Rage Implant, but the Violence Implant cost nearly one hundred times more. You do the math.
We recommend using two Rage Implants and two Survival Implants.
The two Rage implants will boost inflicted damage by 2%, enabling the Dual Blade to one-hit-kill ordinary Rumblers in Red Zones. The Survival Implants will decrease incoming damage by 2% - and this is, after all, a Survival Build.
The same recommendation holds true for both the Luxury Variation.
|
Survival Build: Luxury Variation at Secronom Bunker
Levels 51-105 (Master's Program) |
|
|
STATS |
PROFICIENCIES |
|
Strength: 50 |
Melee: 110 + 10 = 120 |
|
Endurance: 100 (124) |
Pistols: 5 |
|
Agility: 100 (124) |
Rifles: 20 + 100 = 120 |
|
Accuracy: 25 (49) |
Shotguns: 120 |
|
Critical Hit: (112) |
Machine Gun: 0 |
|
Reloading: 32 + 55 = 87 (111) |
Explosives: 0 |

Recommended Weapons:
- Melee: Dual Blade
- Chainsaw: Grinder X3
- Rifles: Rebellion, Hawk OP96, M82A2, Corpse Piercer, Marksman G8, Worg Carbine, Longshot
Recommended Armour:
- Strength: Corpse Carapace
- Non-Strength: Shinobu Mesh, Hazard Mesh
Weapon Proficiency:
- Raise Melee to 120 for the Dual Blade & Grinder X3
- Raise Melee to 40 for the Rebellion
- Raise Melee to 110 for the Corpse Piercer
- Raise Melee to 120 for the Marksman G8, Worg, or Longshot
Stats:
- Add 55 points to Reloading
- Alternatively, dump some points into Accuracy, if desired.
Implants:
- 2 Rage Implants
- 2 Survival Implants
After Level 50, max Melee proficiency for a Dual Blade and a Grinder X3; then raise Rifle proficiency to 40 for a Rebellion. Meanwhile, raise Reloading and Accuracy to suit personal preference. Equip two Rage Implants to boost the Dual Blade's DPH to one-hit-kill Rumblers, and two Survival Implants to decrease incoming damage by 2%.
Several mid-level rifles are not shown in the Luxury Variation's weapon progression, because we are assuming that students can afford the 40-proficiency Rebellion, which outperforms subsequent rifles until the 577 Rex and the Corpse Piercer.
The Hawk Op and the M82A2 are included because they deliver more Damage Per Hit than the Rebellion, even though their Damage Per Second is lower because of slower firing speed. They also have the advantage of Very High Accuracy.
Because of the investment in Reloading, the ammunition capacity of firearms is not as significant a consideration as it is for the Economy version of this build. Though the reloads times are still noticeable, students will be able to use low-capacity weapons, with less concern about safety.
In any case, students should not be spending too much time in the far eastern regions of Fairview. The rational behind the Survival Build is that it allows postgraduate students to live in other areas without concern about looting food (which the farmer produces for himself). Trips to Secronom should be made to purchase inventory as low prices in the marketplace and transport them to other outposts where they can be sold at markup.
SURVIVAL BUILD
COMPLETING THE POSTGRADUATE PROGRAM
Level 105 marks the conclusion of the Postgraduate Program in this field, with students earning their Masters Degree in the Scientific Minimalist approach to Dead Frontier.
The Economy Version of the Survival Build should reach Level 105 with a Dual Blade, Goretooth, Painshot, and VSS Vintorez. The Luxury Variation should have a Dual Blade, a Grinder X3, an Ace Barrel or a Buckblast, and a Rebellion.
After Level 105, graduate students with the Economy Version may consider a stat-rest to the Luxury Version when they have earned enough money to afford the 50-Strength Shotguns.
Students using either version of the Survival Build may consider a reset when the equip high-end rifles requiring only 80 stat points in Critical; however, lowering Critical will impair Chainsaws. We recommend sticking with the Survival Build.
SURVIVAL BUILD: HYBRID OPTION
BOXER PROFESSION WITH REVOLVERS
The Survivor Builds are somewhat eccentric options for combining Shotguns and Rifles. For a more conventional build, with a traditional stat allocation, students can opt for a Hybrid with Revolvers instead of Rifles: Cap Critical Hit at 80; then max Strength.
Students can still use Chainsaws, but they will suffer from low Critical Hit. Likewise, low-end Rifles would under-perform, as would Automatic Pistols, both of which need 112 in Critical Hit. However, Revolvers will be optimized at 80 (the same is true of of high-end rifles beginning with the 577 Rex).
For students who choose this option, we recommend becoming a Police Officer. This profession receives +10 in Pistols, +10 in Shoguns, +10 in Accuracy, and +5 in Reloading. This advantages will make it easier to get the undergraduate version of the build near-complete by Level 50.
We also suggest raising Pistol proficiency before Melee, so that students can equip a decent handgun as soon as possible: the 100-proficiency Alpha Bull can be obtained by Level 18. After that, raise Shotguns and then Melee.
The downside of this build is that, by raising Melee last, students loose its greatest advantage: it works well during Freshman and Sophomore semesters. By the time students have maximized Pistols and Shotguns, they may question whether they even want Melee as their third weapon, when more tempting options are available, such as the Hybrid Build with Pistols, Shotguns, and Grenades.
Recommended Build Templates:
- Critical Build with Melee, Submachine Gun, Rifle
- Critical Build with Pistol, Submachine Gun, Grenade Launcher
- Critical Build with Melee-Chainsaw, Sub-Machine Gun
- Survival Build with Melee-Chainsaw, Shotgun, Rifle
- Assault-Hybrid Build with Pistol, Machine Gun, Grenade Launcher
- Hybrid Build with Pistols, Shotguns Grenades
Body Count
1254177