Many changes have taken place in Fairview while Dr. Raglan has been on sabbatical, including new weapons and new threats, such as bandits. Dr. Raglan plans to update the syllabus to help keep students better informed about how to deal with these developments.

Messages from the Dean's Office
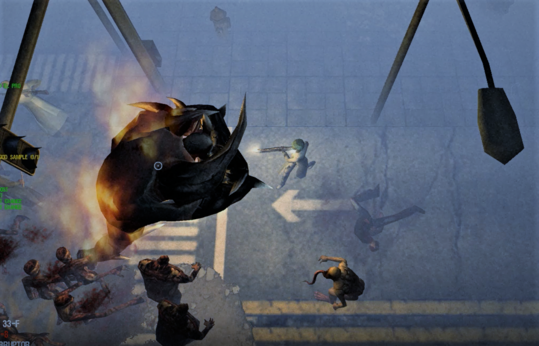
WAIL OF THE WENDIGO coming December 2020
ZHU has received information that strange things will be happening in the city of Fairview from December 18 through January 3. Reports are that there will be a new boss identified as "Wendigo" with a "bloodcurdling scream." Also, an evil Santa with Elf Commandos will be "cleansing" the streets of the city. These seasonal creates will drop Christmas-themed loot, which can be used to crats two new cosmetic items.
Students who brave these new terrors will be rewarded with double experience points and double the probability of looting weapons, ammo, and armor, and there will be a new Limited Edition weapon available in the credit shop.
Chimney Sweeper
As an anonymous poster pointed out in our Feedback forum, the limited edition Chimney Sweeper (which was available for sale during the special Christmas event) "adheres exactly to the core concept of scientific minimalism, but applied on a higher level, i.e. the bosses previously concluded to be impervious toward scientific minimalism." We have been running some field tests with the Chimney Sweeper, and it is an amazing weapon, offering incredible knockback combined with DPS on par with mini-guns.
Starting at $26-million in the Secronom Bunker marketplace, the Chimney Sweeper is not an inexpensive weapon, but it is an excellent value for the money compared to the previous best shotgun in Fairview, the Buckblast, which currently starts at $65-million. If you can scrape together the cash for a CS, do so.
Massive Changes to DEAD FRONTIER
Coming back from sabbatical, I see there have been a few major changes in the world of Dead Frontier, which will require a major revamp of our curriculum.
First and foremost, through some sort of mysterious mutation, explosive zombies (bloats, irradiated black rumblers, mothers, etc) no longer explode when killed with melee weaponry (including chainsaws). This is a major advantage for students using those weapons, all but eliminating the need for single-shot looting weapons, which were formerly used to kill those zombies from a safe distance.
The second major change is that the city of Fairview now offers "crafting" services, which allow students to craft more powerful weapons from components looted in the city. Unfortunately, in most cases, the necessary items must be looted from special bosses called Devil Hounds, which spawn once per day and are nearly impossible to kill. Students can also loot needed items from special bosses that appear only during holiday seasons, such as Santa and Reindeer.
The third change is less a change than a realization of something that has been true but not fully understood: rapid-fire weapons do not do all the damage that they were supposed to do. The reasons for this are complex, but essentially their listed rates of Damage Per Second were always "theoretical" - that is, what could be achieved if they were working perfectly, which only happens in laboratory situations. In the field, these weapons put out their listed Damage Per Hit, but their firing rate falls short. So, for example, an assault rifle that supposedly fires 8.57 times per second actually fires closer to six times per second.
It's important to remember: this has always been true, Up till now it was acknowledged obliquely that actual DPS fell short of the listed numbers. The only change is that now the exact, actual DPS is listed on the Dead Frontier wiki pages. At a glance, students might be fooled into thinking these grinding weapons have been downgraded, but in fact they are working exactly as they always have.
We will go into our lesson plans at our earliest convenience to makes changes based on these changes and new information.
A Lesson in Reloading: Greyhawk vs VLock
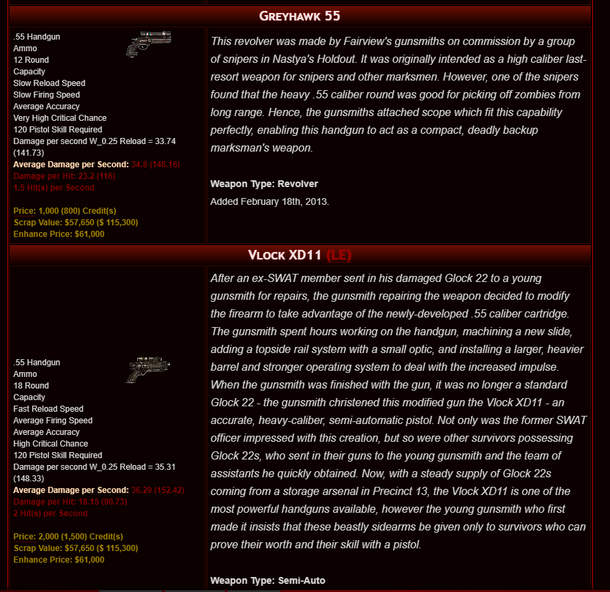
Not to keep anxious students in suspense: The point of this lesson is that a Greyhawk revolver with 107 in Reloading delivers as much Damage Per Second as a VLock automatic pistol with 124 in Reloading.
Why is that significant? Because there is an unfortunate school of thought among some Dead Frontier "experts" that Reloading is a relatively insignificant stat, which can be short-changed in favor of Accuracy or Endurance. As the Greyhawk vs VLock comparison shows, this is not true.
What follows involves some complicated math. Before proceeding, students should read a much simpler comparison between the Alpha Bull revolver and the VSS Vintorez rifle in our Introduction to Weapons. That comparison is relatively easy to grasp because the Alpha Bull and the VSS have the same firing rate and, when optimized, virtually the same DPS; the only significant difference is ammo capacity, which results in the Alpha Bull having to reload more frequently. Consequently, a VSS with fewer points in Reloading can keep pace with the DPS of an Alpha Bull with maximum Reloading.
The distinction between a Greyhawk and a VLock is more complicated, because the Greyhawk is a revolver and the VLock is an automatic pistol, with different ammo capacity, firing speed, Damage Per Hit, and Damage Per Second. So let's take a look at the differences:
- The Greyhawk holds 12 rounds, fires 1.5 times a second, delivers 116 damage points per Critical Hit and 146 damage points per second.
- The Vlock holds 18 rounds, fires 2 times per second, delivers 90.7 damage points per Critical Hit and 152 damage points per second.
When both weapons are optimized, the Vlock is clearly superior, delivering more knock back and DPS because of its higher firing rate. However, as mentioned at top, if the Vlock's Reloading is only 107, a Greyhawk with 124 in Reloading delivers the same DPS.
This is absurd. The Vlock is far more expensive to purchase and operate (because of its lower DPH, it costs more to supply the weapon with ammo). Shortchanging the Reloading stat renders this luxury item no more effective than the much cheaper Greyhawk - a waste of cash for students who fall for the myth of Reloading Insignificance. Students who want to get their money's worth will invest stat points in Reloading.
It is not necessary to take our word for it. Check out the math below.
The Greyhawk, firing 1.5 rounds per second, empties its 12 chambers in 8 seconds. With an average DPH of 97.44, it delivers approximately 1,169 Damage Per Clip.
The Vlock, firing twice per second, empties its 18-round magazine in 9 seconds. With an average DPH of 76.21, it delivers approximately 1,371 Damage Per Clip.
We mentioned the official DPS of both weapons above, but it is worth remembering that the effective DPS is lower because of pauses to reload. The actual DPS of a Greyhawk with maximum Reloading is 141.73. The actual DPS of a VLock with maximu Reloading is 148.30. During short bursts, this distinction is statistically insignificant, but it makes a difference during prolonged firing (as when killing a powerful boss zombie, for instance).
Now, let's take a look at a relatively simple comparison, to see how Reloading stat affects the relative effectiveness of the weapons.
Because of their different firing rates and ammo capacity, we need to find the equivalent of a common denominator for the two weapons, a point in time when we can clearly compare them to each other. Since the Greyhawk reloads every 8 seconds, and the VLock reloads every 9 seconds, let's multiply those two numbers together and see what happens after 72 seconds of continuous firing.
At this point, the Greyhawk will have reloading 9 times; the VLock will have reloaded 8 times. If both weapons have maximum reloading (which results in a .25-second pause to swap in a new clip), the Greyhawk will have spent 2.25 seconds reloading (9 X .25), and the Vlock will have spent 2 seconds reloading (8 X .25).
Add this up, and we see that it takes 74.25 seconds total time for 72 seconds of firing time for a Greyhawk; it takes only 74 seconds total time for 72 seconds of firing time from the VLock. Again, not significant in the short term, but this adds up during lengthy firefights.
What happens if we shave points off the VLock's Reloading stat?
Because the VLock has Fast Reloading Speed, each point subtracted from the Reloading stat adds. 0.02 seconds of time per each reload. If we stick to our 72-second comparison, the VLock will reload 8 times, adding 0.16 seconds to its reload time, for a total of 2.16 seconds after 72 seconds of firing - still less than the Greyhawk.
Shaving off another point in Reloading adds another 0.16 seconds for a total of 2.32 seconds total reload time after 72 seconds of firing. Although this is slightly more than the Greyhawk, the VLock will still deliver more DPS.
How much more reload time does it take to lower the VLock's effective DPS to that of the Greyhawk? Recall that, with maximum Reloading, the actual DPS of the Greyhawk is 141.73; the actual DPS of the VLock is 148.3.
The math looks like this:
141.73/1 = 148.3/X
141.73X = 148.3
X = 148.3/141.73
X = 1.04
In other words, for every second both weapons are firing, we need to add 0.04 seconds of reload time to the VLock. Dealing with such a small number makes it hard to see the significance, so let's scale things up and imagine a situation in which a student is firing for 100 seconds continuously, whether grinding during an outpost attack or hunting a boss.
During these 100 seconds, the Greyhawk will deliver 14,173 damage points; the VLock will deliver 14,830 damage points. To get the VLock's damage down to the level of the Greyhawk, we need to make it take 4 seconds longer to deliver its damage; we do this by adding 4 seconds to the reload time.
It works like this:
Vlock fires 208 rounds in 104 seconds (2 rounds per second). Math tells us the weapon will Reload approximately 11.5 times during this period. The situation is easier to grasp without the half-reload, so let's double the numbers and say the VLock fires 416 rounds in 208 seconds.
During that time, the weapon will reload just about 23 times. We want to add 8 seconds to the weapon's reload time, averaged over those 23 reloads.
8/23 = .34 per reload. In order to raise the VLock's reload time by .34 seconds, we need to shave off 17 points from the maximum of 124. That lowers the weapon's Reload stat to 107.
At this point, the VLock's effective DPS approximately matches the Greyhawk's. A weapon that can currently be purchased in Secronom Bunker for just over $2-million (for a God-Crafted version) will perform as well as a weapon that costs $13-million for a God-Crafted version.
In effect, losing those 17 points turned a $13-million weapon into a $2-million weapon. In a sense, "saving" those points in Reloading cost $11-million dollars - which is hardly any kind of savings at all.
Think about that the next time an "expert" declares that Reloading is insignificant.
Crafting Weapons
Zombie Hunter is a little bit late responding to this development, which was posted on the Dead Frontier Wiki on March 26, 2019 but which actually took place in December 2018. It is now possible to craft specialty weapons and a special "Devil's Implant" by using items looted from a new type of boss, an inner city Devil Hound.
Crafted items include the Santa Slayer (blade), the X-Hammer (blunt), X-Python (pistol), X-Garand (rifle), X-MP5, X-Mannberg (shotgun), X-M79 (grenade launcher), X-AK 47 (assault rifle), and the Devil's Implant (3% damage reduction, 5% speed increase).
These items are roughly equivalent to X-Dusk equipment - which is to say, they are top of the line. They can be purchased in the marketplace, but they are extremely expensive. Students who wish to avoid the expense can hunt the inner city Devil Hounds, which spawn once every few days.
Crafting these items typically requires one blueprint, five parts, and three Devil's Hearts (sometimes five), plus the original version of the item to be crafted. Thus, to create an X-MP5 submachine gun, a student would need an MP5 submachine gun, one X-MP5 blueprint, five X-MP5 parts, and three Devil's Hearts. A student would then take these items to the new Crafting section in the Outposts and spend a fee ranging from $500,000 to $3,000,000 to create the crafted version.*
The new crafted weapons can be very useful in the White Zones northeast of Secronom Bunker and, especially, in the Wastelands. However, they are long-term goals rather than must-have necessities. Students in the school of Scientific Minimalism should focus their attention on the course work and worry about acquiring these weapons after they have achieved their post-graduate degrees.
*It is possible to create a Nail Bat from a Baseball Bat and some Nails, for a $100 fee. This hardly seems a worthwhile endeavor.
Get more info here: https://deadfrontier.fandom.com/wiki/Crafting
Just Posted: Secronom Bunker Missions
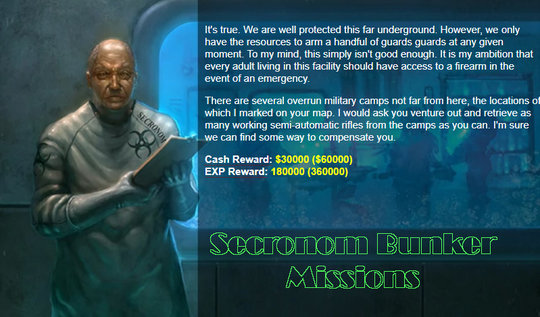
After posting individual lessons over the course of the past few weeks, we have finally completed and posted our complete guide to Secronom Bunker Missions.
It contains everything you need to know about how to successfully complete all 20 missions offered at Secronom Bunker.
Lesson: Mutate Away mission in Secronom Bunker
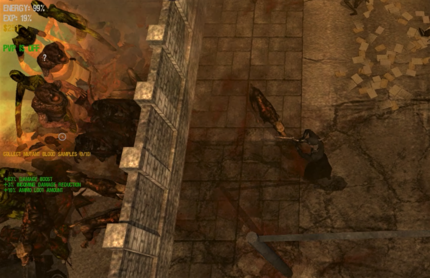
- Type: Kill & Loot
- Goal: Exterminate ten Irradiated Long Arms, loot their blood samples
- Zombies: White Zone Population, particularly Irradiated Long Arms
- Aggro: high
- Suggested Weapons: Doubleshot or Marksman; Hammerhead; Immolator
- Difficulty Level: Slight
 Set in three White Zones in the northeast corner of Fairview, "Mutate Away" is a straightforward kill-and-loot mission, which requires students to exterminate enough Irradiated Long Arms to collect ten blood samples.
There is plenty of agro, so "Mutate Away" is no walk in the park. Fortunately, the targets are relatively easy to kill, and the usual strategies for this kind of mission work here as well.
Students can either:
- Circle the perimeter of the area, killing Irradiated Long Arms along the way and collecting their blood samples during occasional lulls in agro.
- Trap the agro inside a walled or fenced area and blast away until ten lootable corpses are lying shoulder-to-shoulder. Lure agro away and then double back to collect all the samples at once.
We found the Hammerhead assault rifle more than adequate for fending off agro. The Immolator (or other high-end grenade launcher) will quickly kill enough Long Arms for students to bag their quota of blood samples, assuming they are packed closely together in some tight space, such as a parking lot.
Useful Tips:
- In the top-left mission area, the wall around the hospital affords an excellent spot to trap agro and bomb them with explosives.
- This is a good mission for grinding experience - just keep killing zombies even after collecting the blood samples.
Lesson: Baby Blues mission from Secronom Bunker

.
- Type: Search & Rescue
- Goal: Find Miranda, convince her to return
- Zombies: White Zone Population
- Aggro: High
- Suggested Weapons: Hammerhead, AA-12, Street Dog
- Difficulty Level: Challenging
High agro and a reluctant Miranda make "Baby Blues" one of the most difficult search-and-rescue missions.
Students are tasked with finding a woman suffering postpartum depression, who has run away from Secronom Bunker. Her friends have an idea where she may be but not a very solid idea, since there are three widely spaced mission areas:
- The closest is 3 down and 4 right in a Black Zone. We were unable to find Miranda here.
- The second closest is 6 up and 3 left in a White Zone. We found Miranda here.
- The farthest is in the extreme northeast zone of Fairview, 6 up and 4 right from Secronom Bunker. We did not search here, having already found Miranda.
The basic strategy will be familiar to students who have completed any previous search-and-rescue mission.
Enter the mission area and run around the block, seeking Miranda in the open streets. Fend off agro with a grinding weapon.
Miranda is relatively easy to find in the second mission area, standing on the street near an alley. If you do not see her, listen for the sound of fighting as you run down the street.
After finding Miranda, lure zombies away, so that she will speak.
Even with Miranda's help, it is impossible to fight off the agro. She may speak once or twice with zombies nearby, but that is not enough to complete the mission.
It is not necessary to lead the agro around the perimeter of the mission area.
Usually, this is the safest way to outrun agro, but it is possible to circle only the block where Miranda is located and still have time for her to speak before the zombies catch up.
Miranda is the most reluctant of any search-and-rescue target.
She will speak a dozen times before deciding to return to Secronom Bunker.
She may say two or three sentences every time the vicinity is clear of zombies. This means it will be necessary to draw agro away from her four-to-six times.
The biggest challenge of "Baby Blues" is staying alive long enough for Miranda to make up here mind.
The Dead Frontier wiki states that agro in this mission is "near infinite," but we found it manageable.
The real problem is the prolonged risk from repeatedly luring the agro away. There are several tight squeezes (between cars, through bushes) where it is easy to get blocked by zombies. Going round the block once or twice is no great risk, but eventually the law of averages catch up.
Useful Tips:
- The alley next to Miranda is a dead end. We thought we could leave the zombies behind and get to her by entering the building and coming out in the alley. This worked (more or less - we had to fight some zombies inside the building), but when we got back outside, Miranda started repeating previous bits of her conversation.
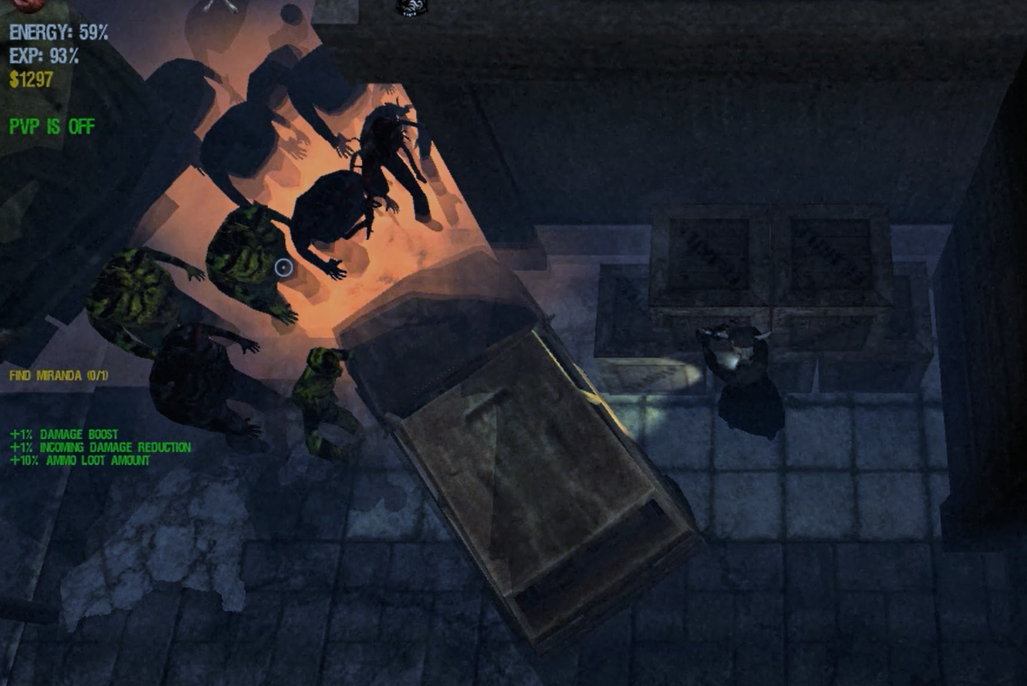 On the southwest corner of the mission area, a car is wedged against a building, with a truck next to it (see full-size image). After completing the mission, it is possible to run between the vehicles, which will trap most of the zombies for a while, providing an opportunity to grind the horde for more experience.
Lesson: Need a Bigger Vial - Secronom Bunker Mission
- Type: Boss Hunt &Loot
- Goal: Exterminate a Flaming Black Titan, loot a blood sample from its corpse
- Zombies: Black Zone Population, Flaming Black Titan
- Agro Level: High
- Suggested Weapons: Doubleshot, Marksman, Ironsight, Longshot
- Difficulty Level: Extremely Challenging
"Need a Bigger Vial" is a straight-up boss hunt, pitting students against the biggest and most dangerous zombie haunting the inner city.
The Flaming Black Titan is so fast, strong, and dangerous that there it is nearly impossible to hunt safely. Ordinary weapons are not going to provide knockback, and skillful dodging is not going to keep you alive long enough to succeed.
Options include group boss hunting and speed boosters. The latter is highly recommended, because, once you can outrun the Flaming Black Titan, weapons become less of an issue - a good looting weapon with optimized accuracy and high Damage Per Hit will do the job.
Just keep running around the perimeter of the mission area to leave agro behind, and keep your finger on the trigger.
We recommend scouting the mission area (6 down, 1 right from Secronom Bunker) before actually taking mission. Fire up a machine gun to get a little agro going; then practice running through the streets to get a feel for the twists and turns needed to avoid obstacles.
There are no good fenced areas where you can trap the Flaming Black Titan.
Fortunately, there are some walls that will block agro. Of course you can trap the Flaming Black Titan behind a wall, but you will not be able to shoot it unless you have a Grenade Launcher.
Nevertheless, trapping the creature for a while will provide an opportunity to recharge your energy if you have expended too much while sprinting.
Doctor Raglan
Dean of Zombie Hunter University

Matriculated
1253161